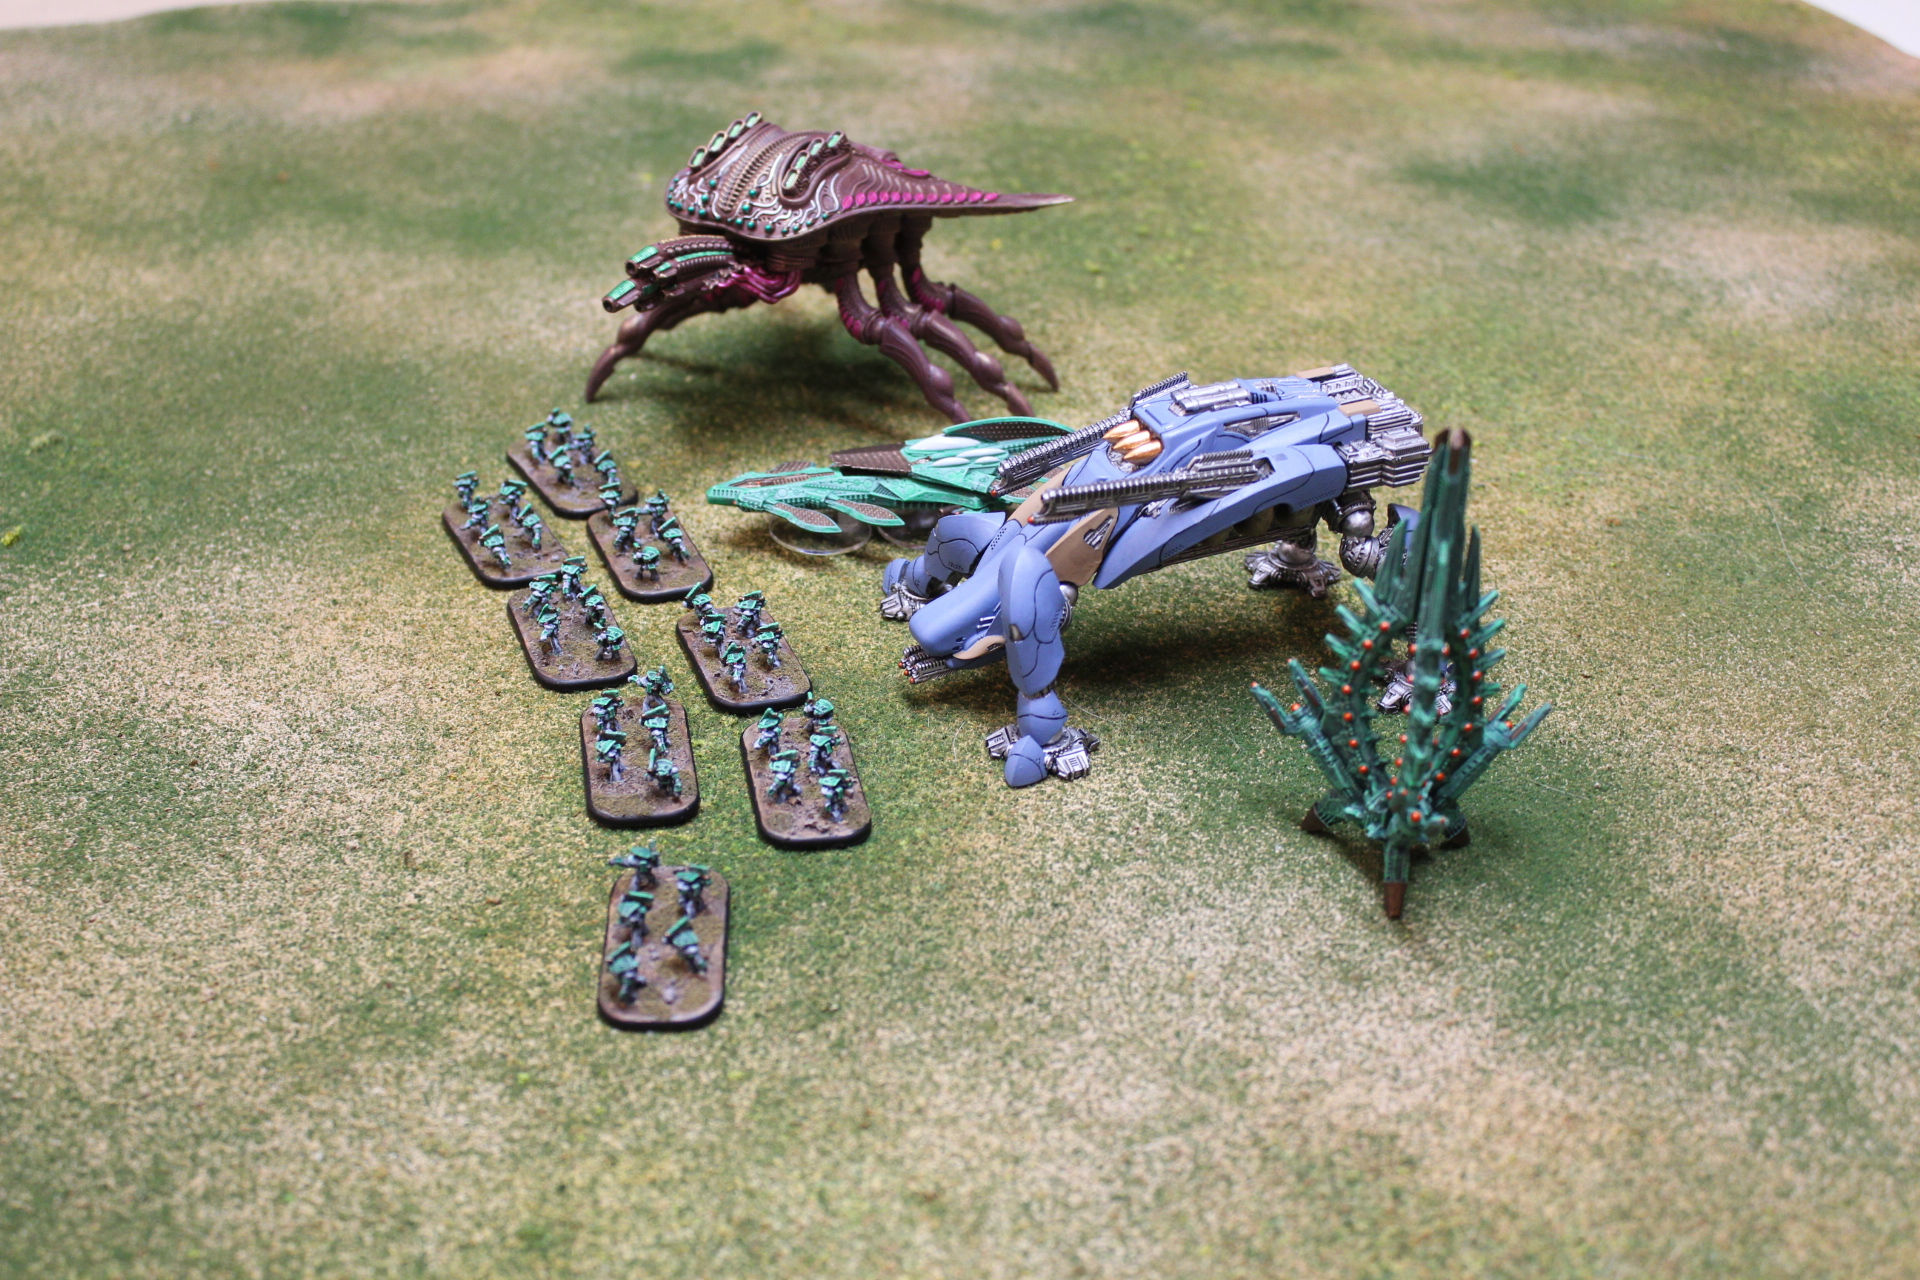
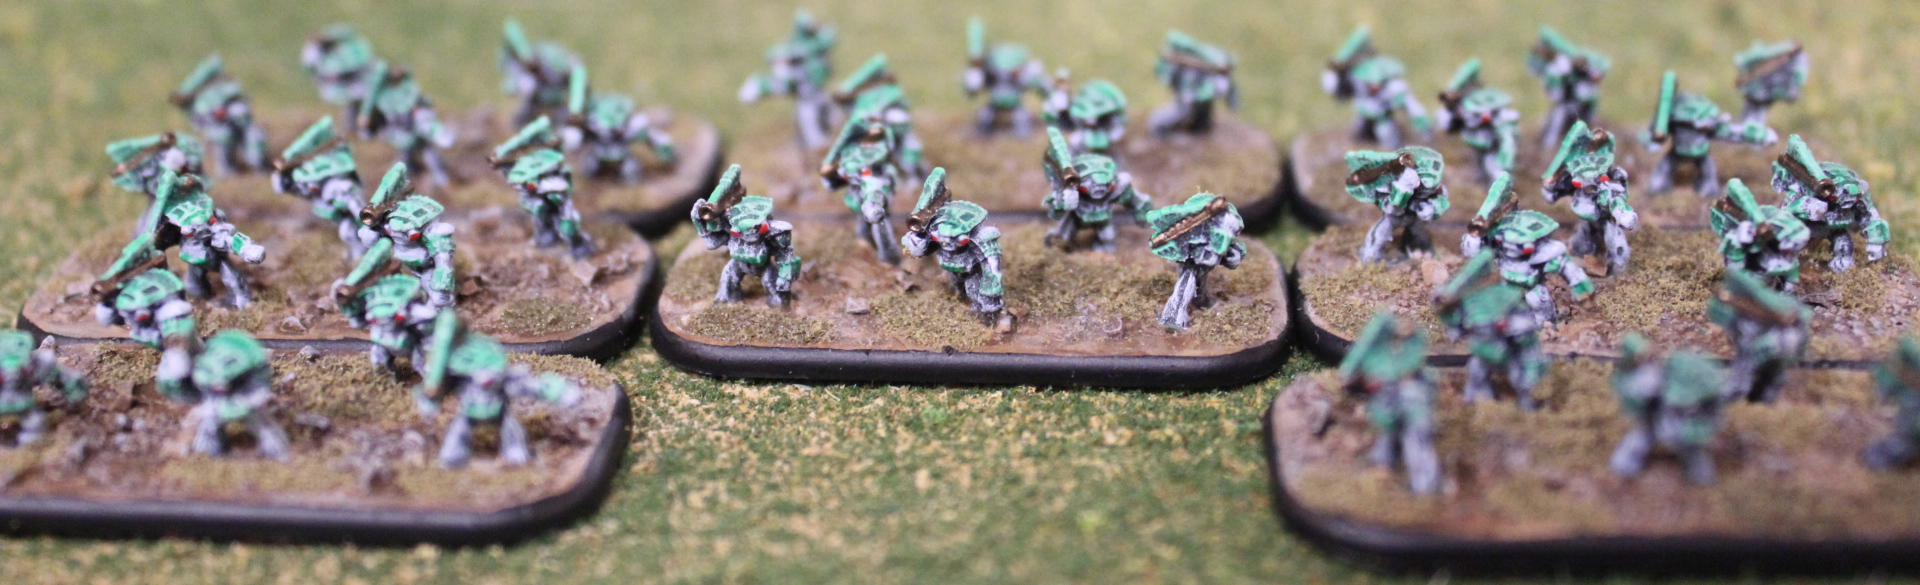
Light behemoths for Scourge and PHR complete. The Scourge one was done in about two days, while the PHR version took me a very slow two weeks. Not that I’m implying the paint job is a quality worthy of that time, it was just a process of painting one tiny bit each night and not sitting down for a good session. Also picked up some assorted Shaltari for cheap.
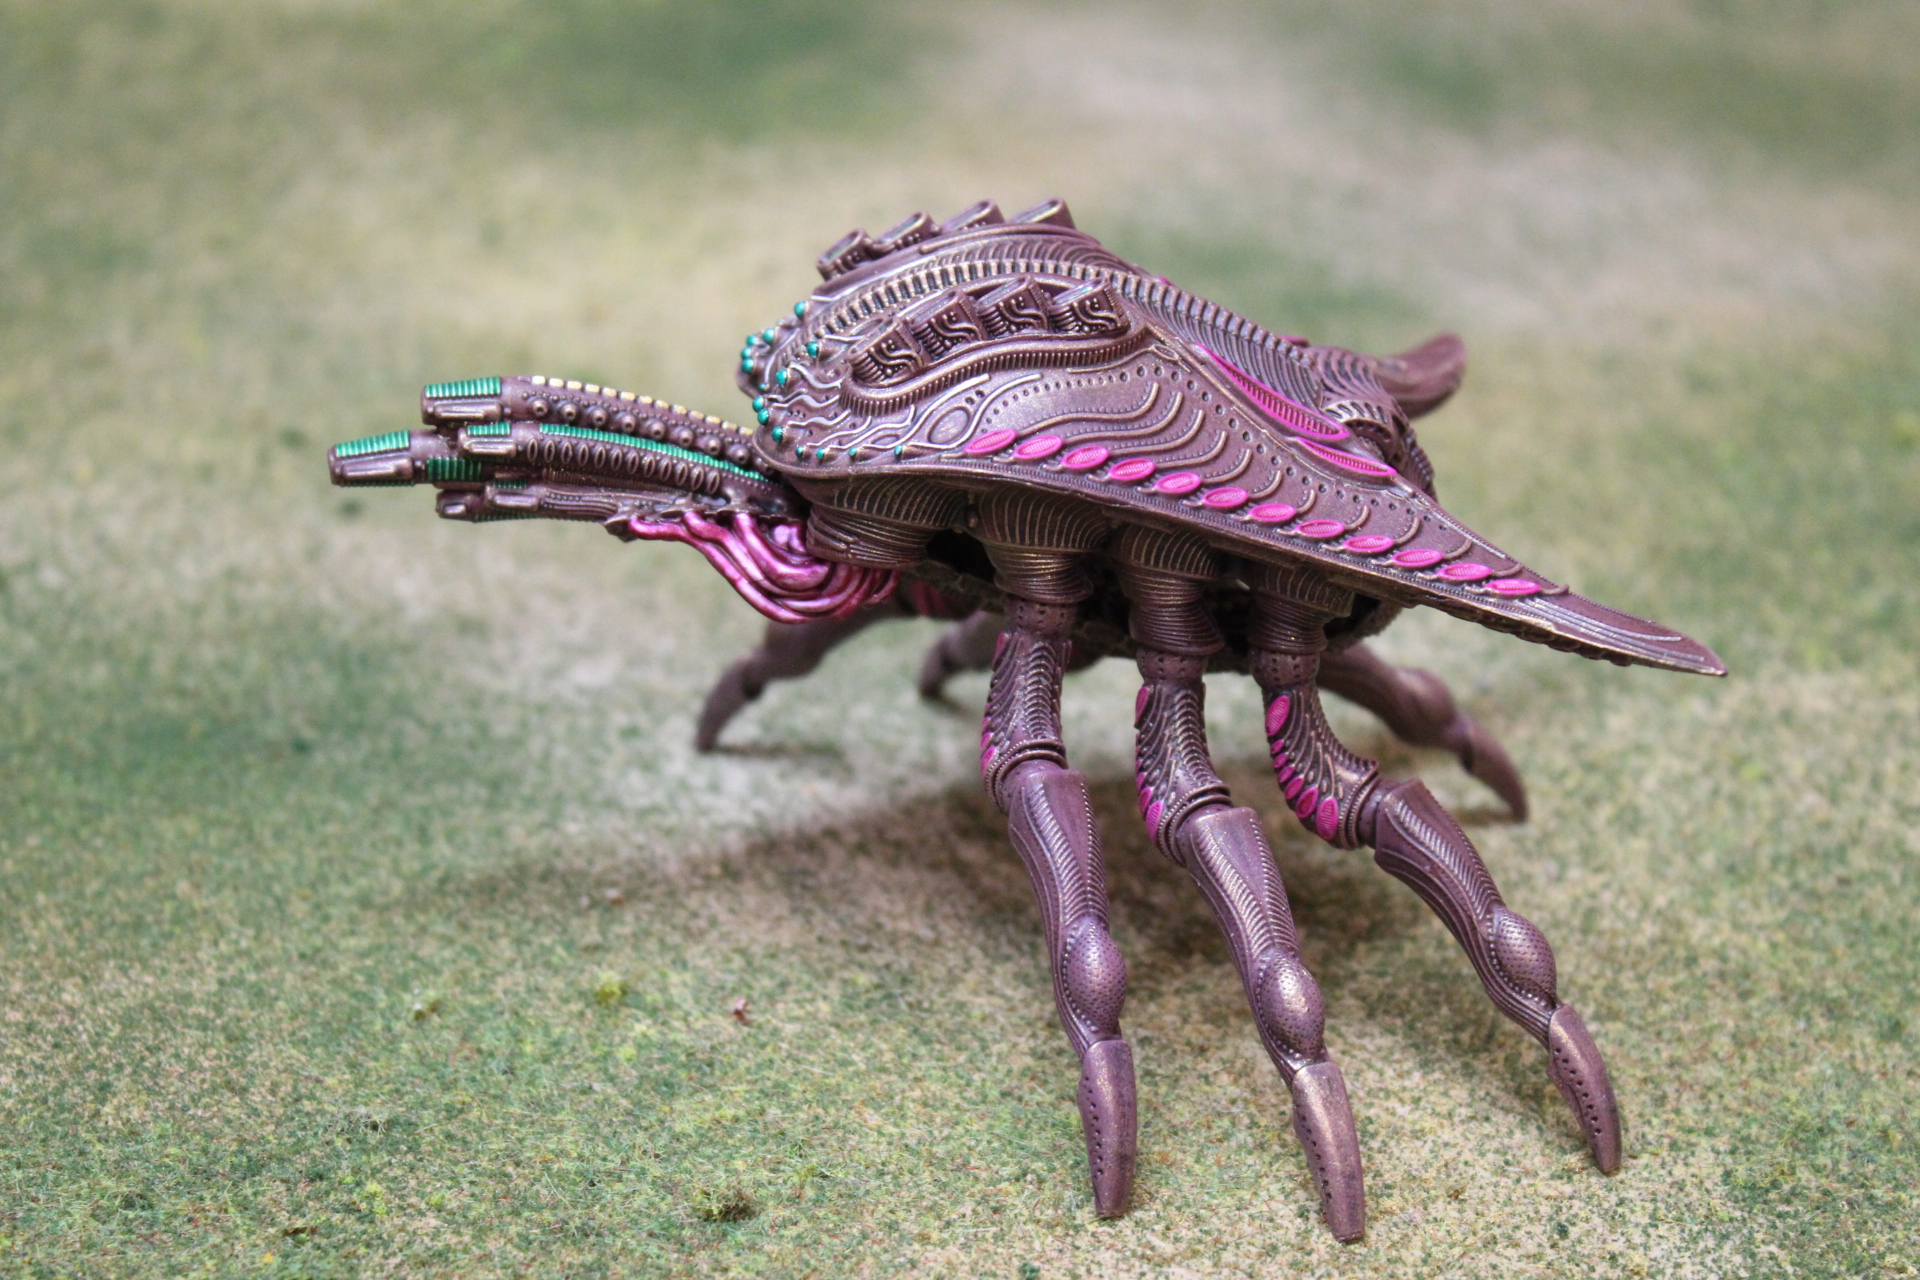
Ignoring how phallic something attached to a crustacean can be, I like how the cables and gun details allow the gun to stand out visually on the table. One thing I think I should go back and do is some of the green plasma/gun/line detail things on the hull-mounted weapons; didn’t really notice them on either model until now. In any case, no major complaints with the cast here, just some mold lines on the cable/gun bit that aren’t too obvious.
Paint job:
Hull: Prime Rustoleum Flat Black, two coats 3:1:1 Vallejo Bloody Red:Basalt Grey:White, followed by a wash of Citadel Agrax Earthshade, then a dry brushing of the same brown color, and lastly another drybrush of Vallejo Gold
‘Vents’: White base, then Citadel Contrast Volupus Pink
Oculus: Vallejo Chrome, and Citadel Technical Waystone Green for the lenses
Cables: Volupus Pink over Chrome
Gun details: Citadel Contrast Warp Lightning over Chrome
The base color is a very silly mixture, that I’m sure could be replicated with the proper brown paint, but I had no browns of this general color when first painting my Scourge stuff. So now I stick with it for consistency!
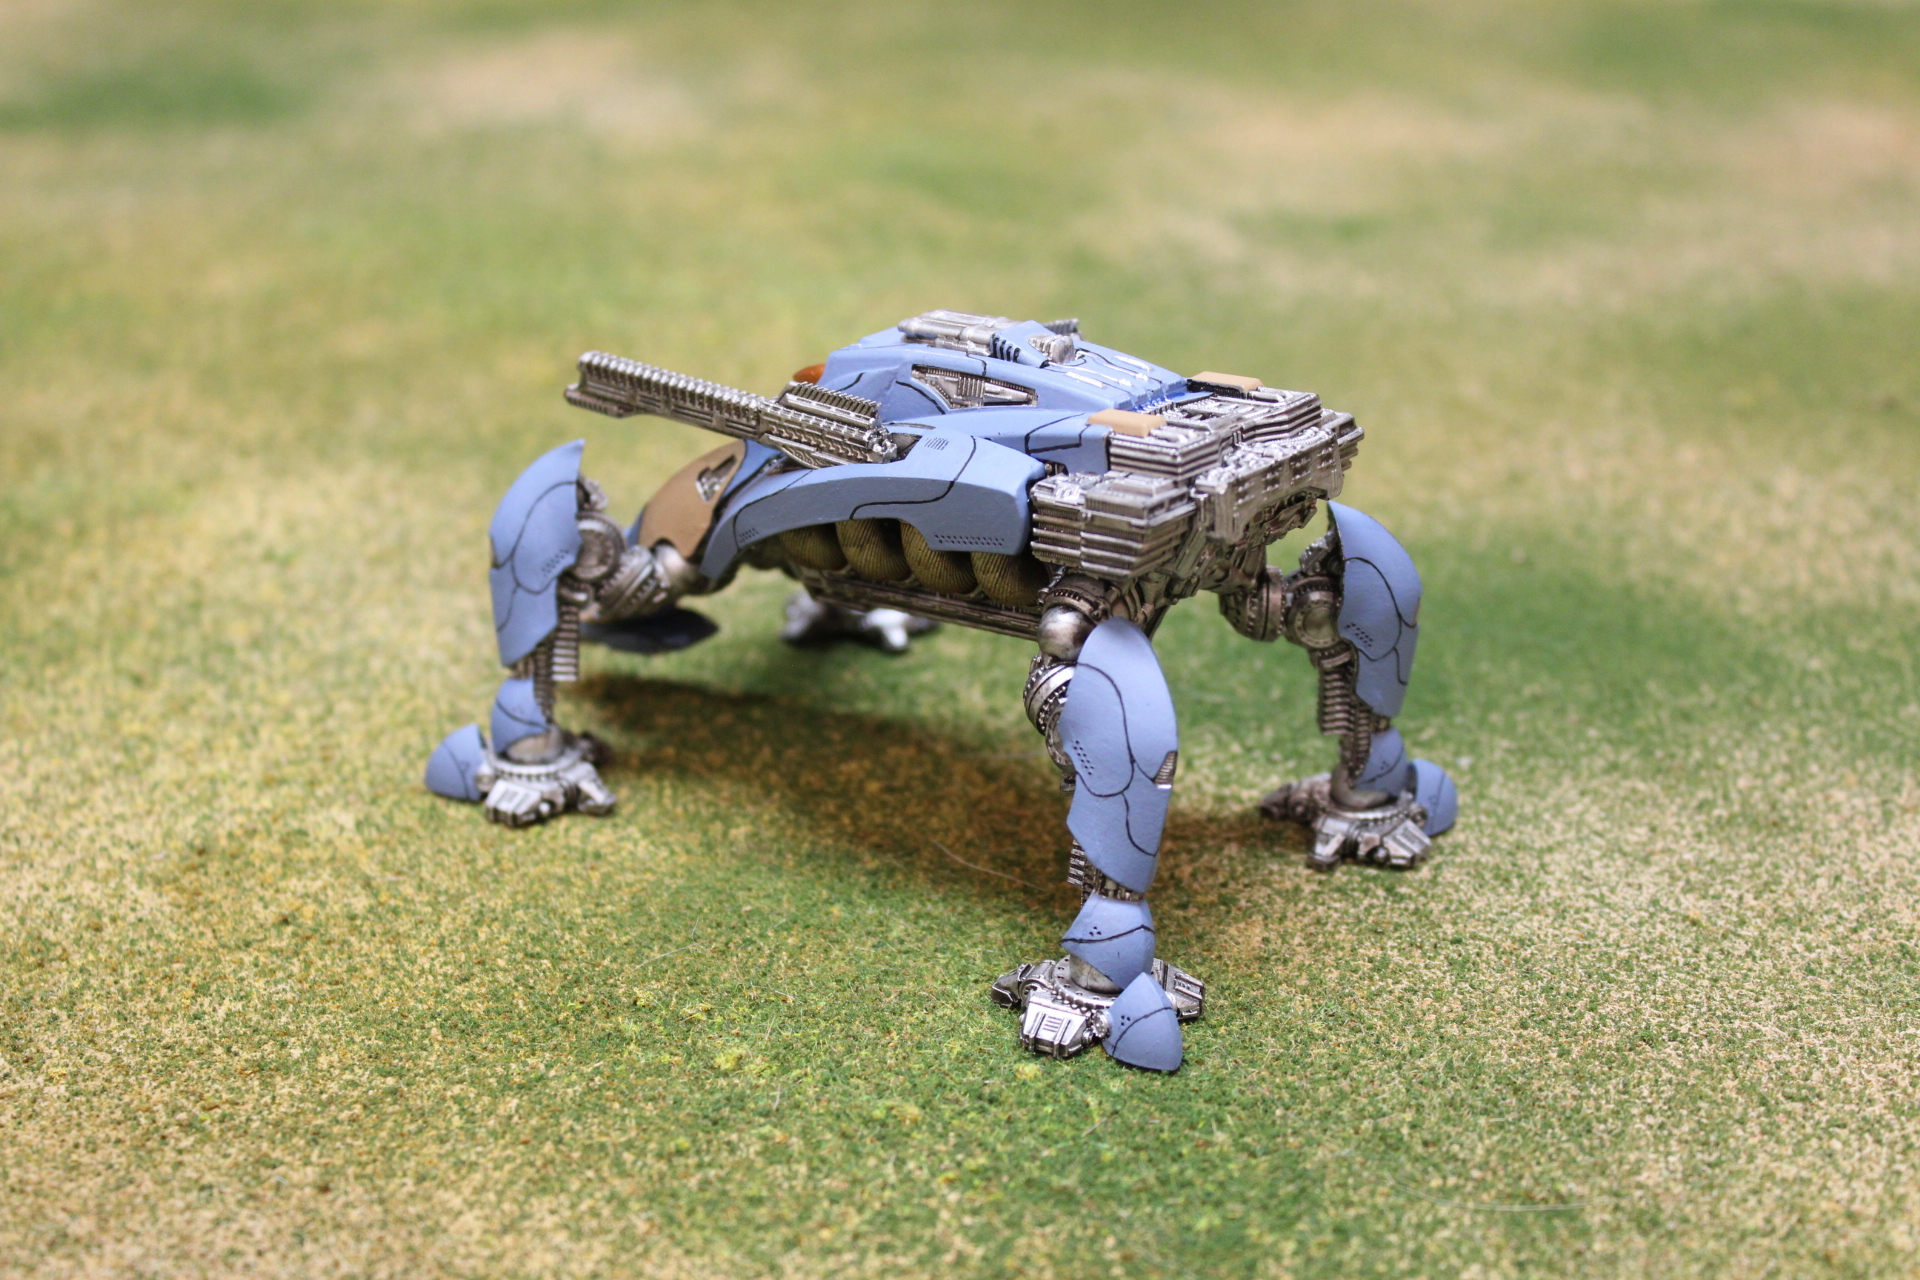
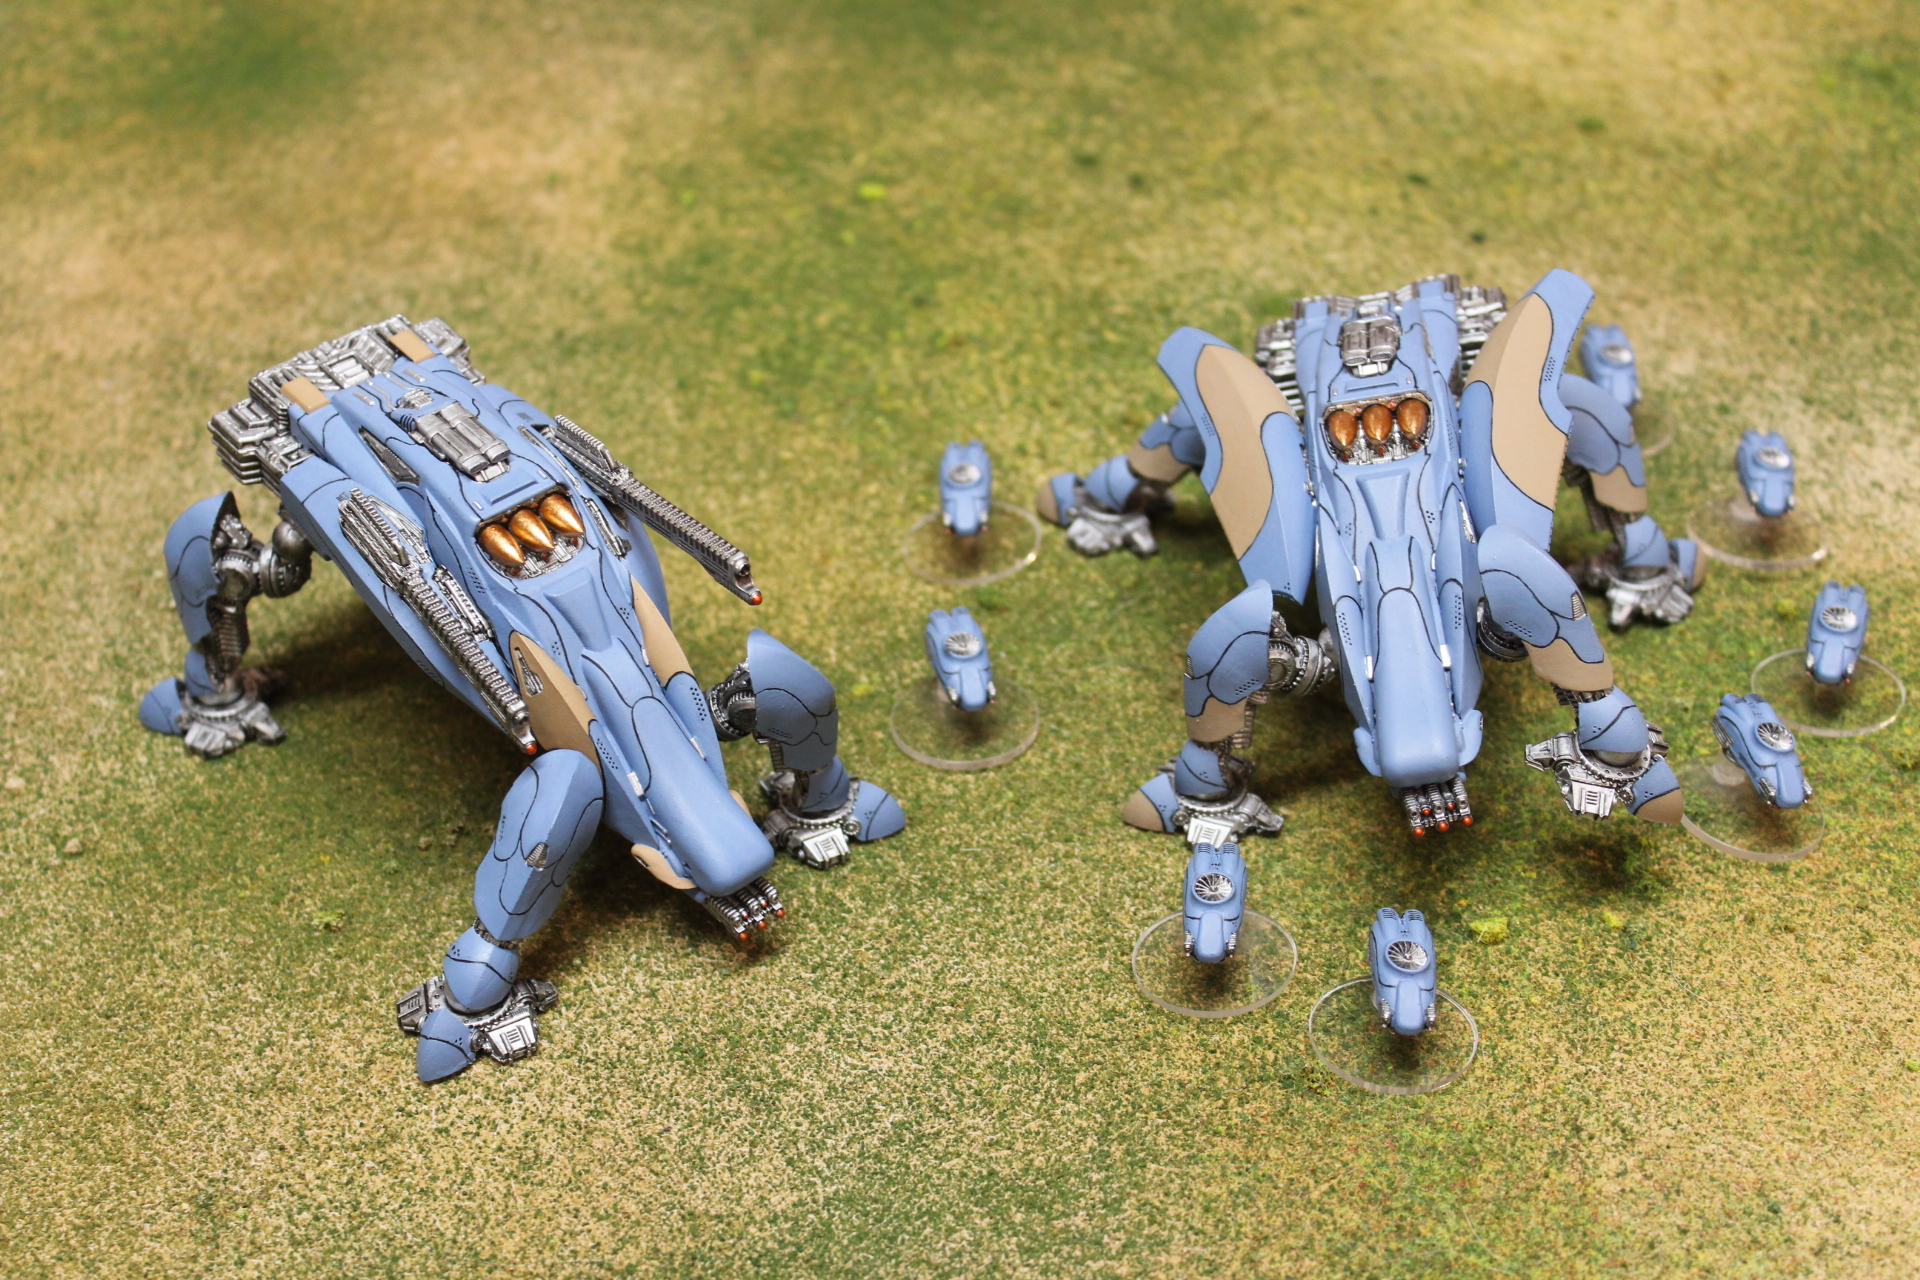
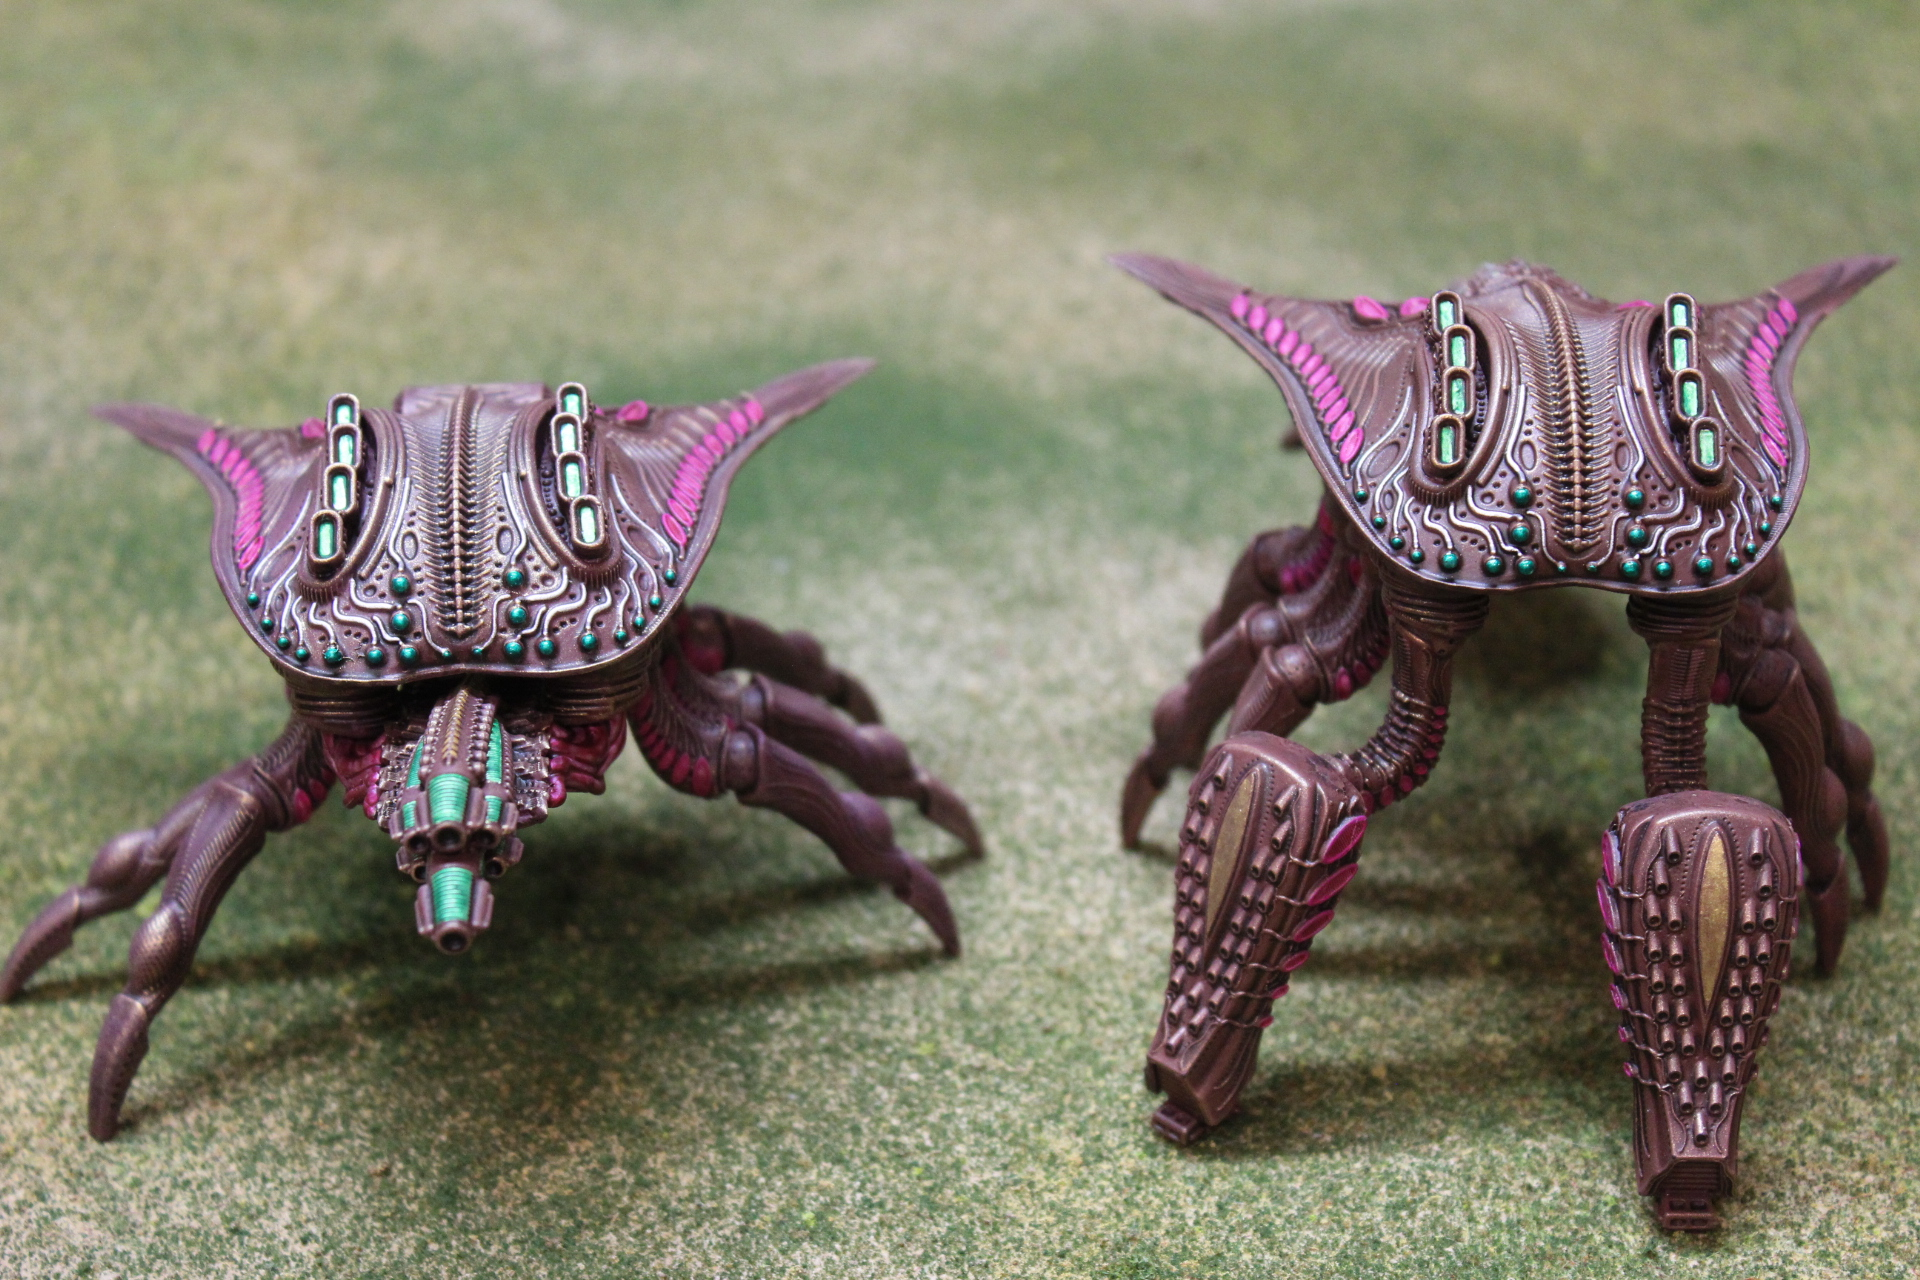
I’ve come to like these the more I handle them, but there’s still a few quibbles with their design. I wonder if a fifth leg, making a triad on the back, would make things look more interesting? And I maintain I wish they were a little bit taller!
Casting wise, I mentioned in a previous post some bad mold slips on the legs. Shaving mostly took care of it, or at least to the point I was content. Only problem after that was the gun-slot on the right side had some miscast resin blob stuff inside it that made fitting the gun a pain in the ass.
Paint job:
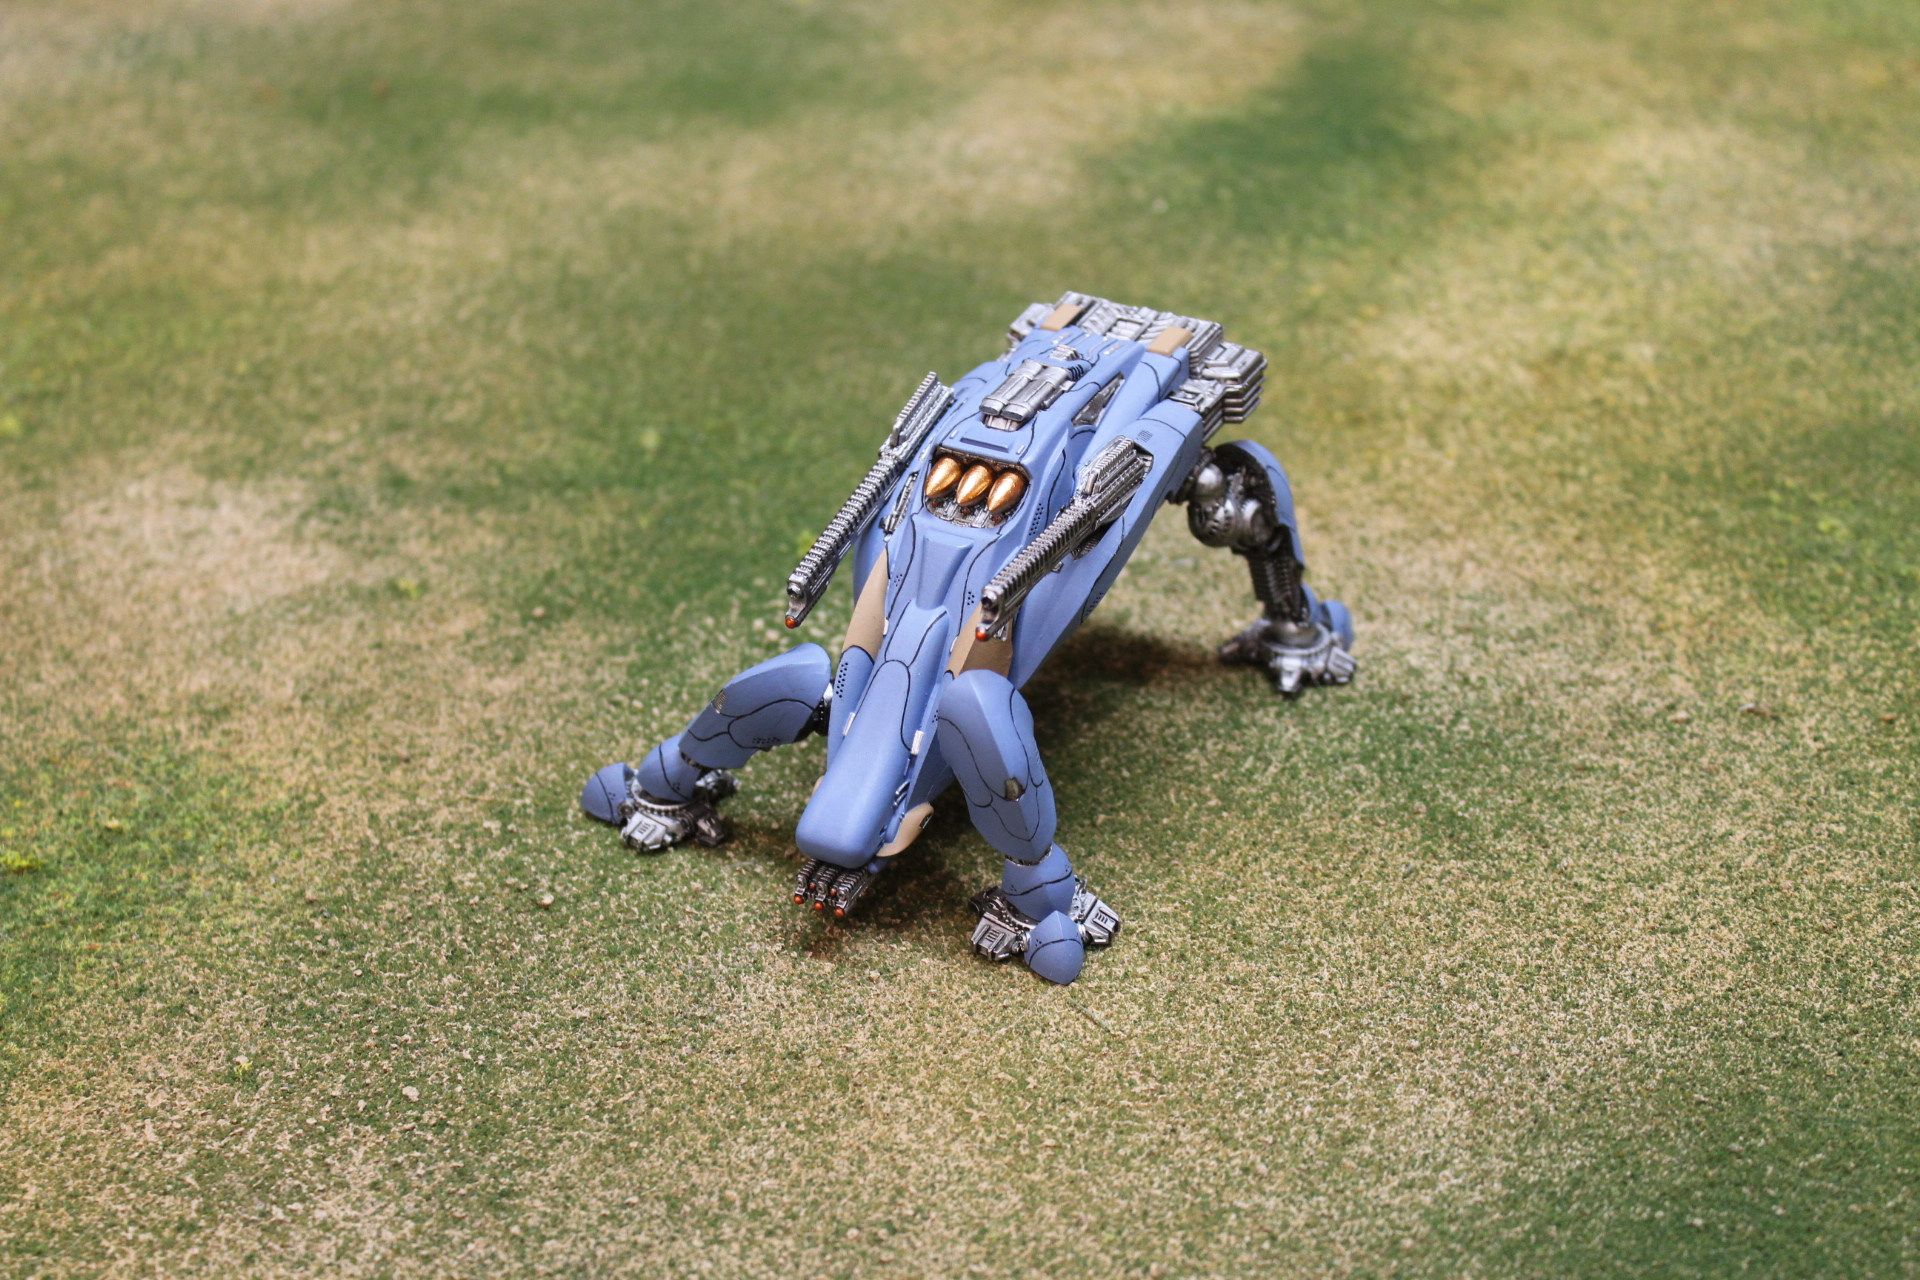
Hull: Prime Rustoleum Flat Black. Blue sections: two to three coats of Vallejo Blue Grey, with careful attention paid to minimize paint filling in panel lines and those hole things. Tan: A basecoat of Vallejo Stonewall Grey, then 1:1 Vallejo Orange Brown and Stonewall Grey. Panel lines/hole things are fixed with sufficiently thinned black paint mixed with matte medium
Metal: Vallejo Chrome, then Citadel Nuln Oil
Lenses: Citadel Technical Spiritstone Red
Cables: Army Painted Light Tone over Chrome
Missiles: Vallejo Bright Bronze over Chrome
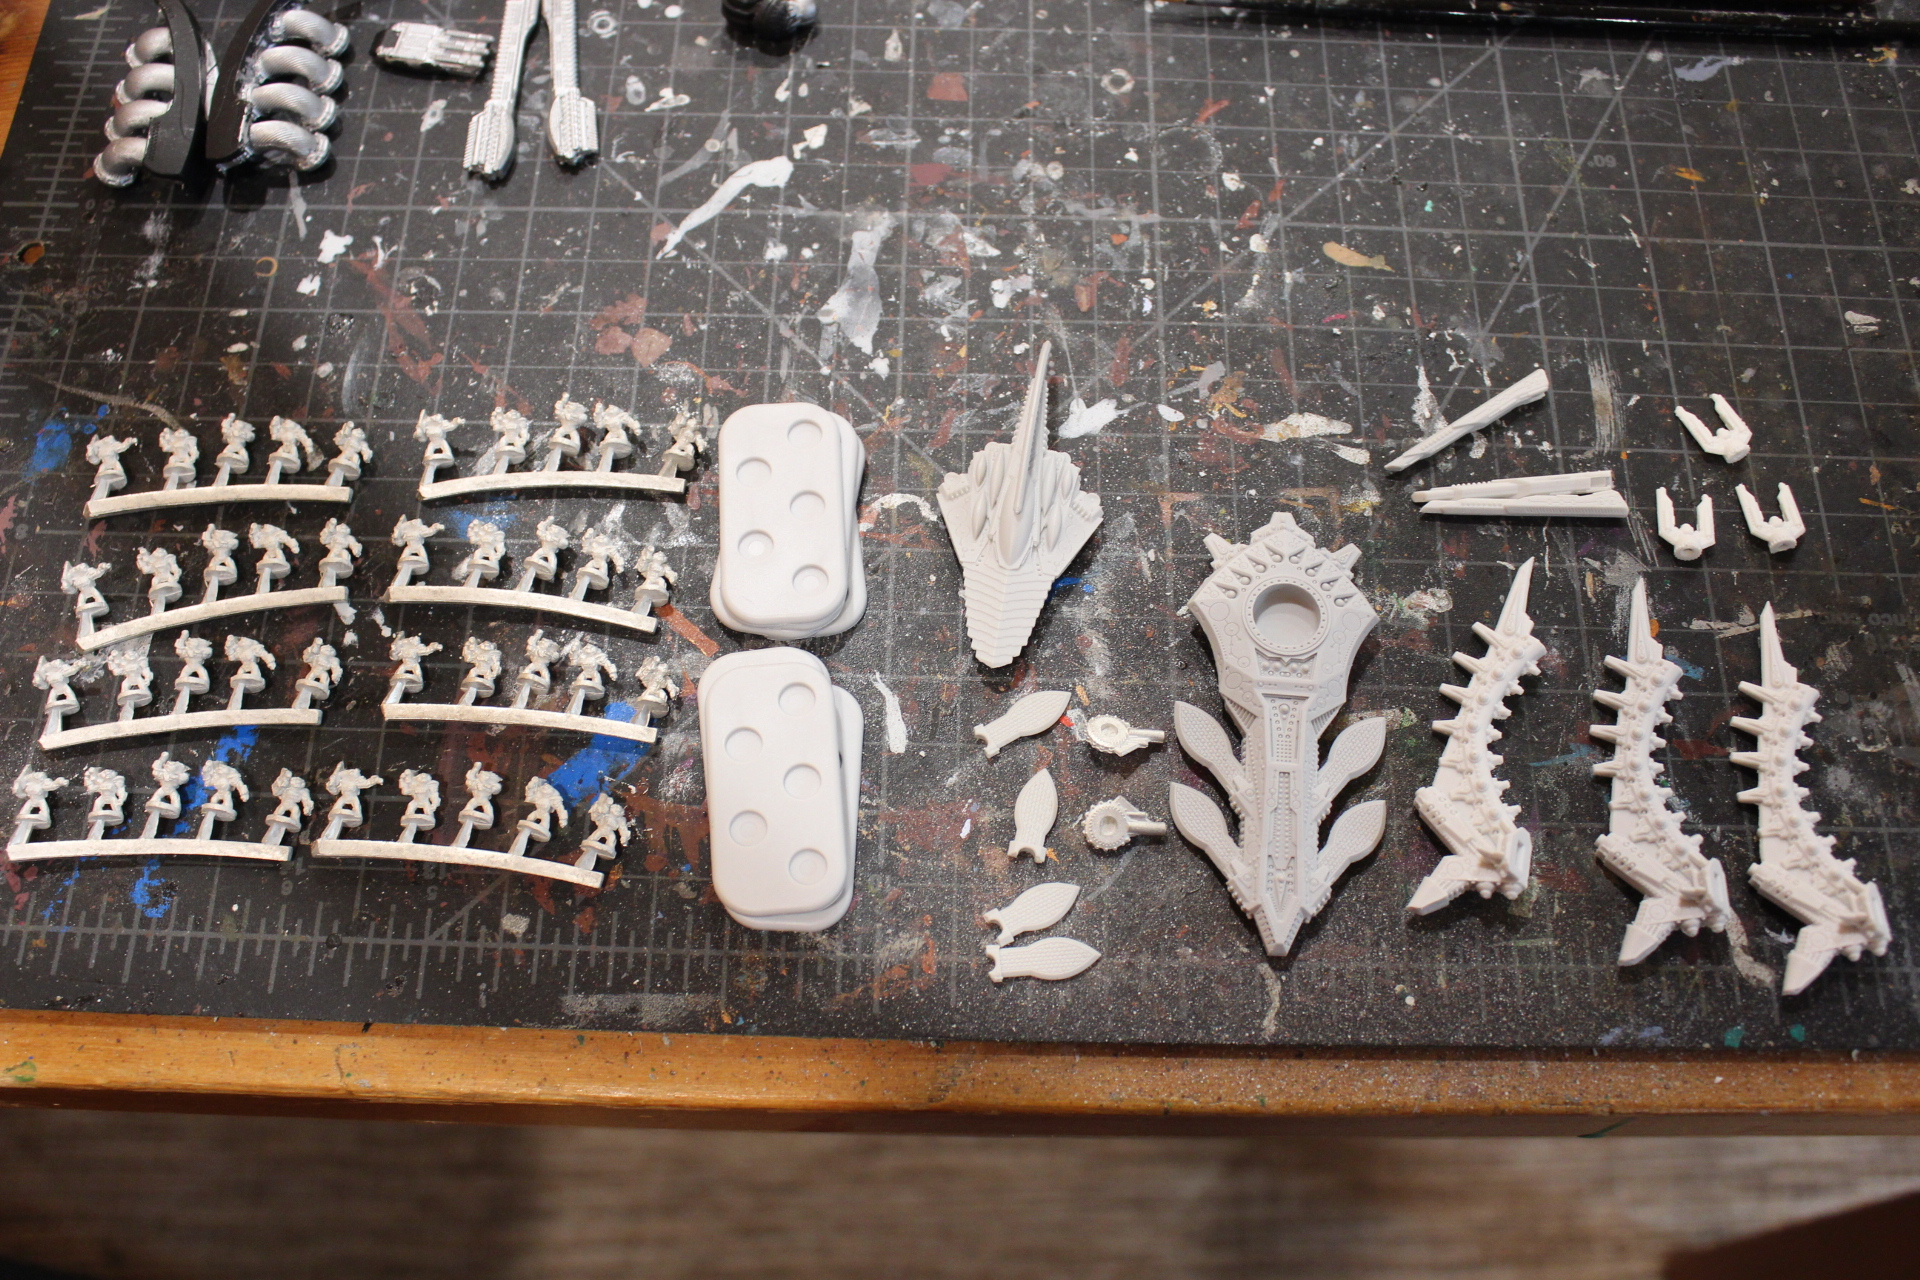
There was no particular intended purpose/list/whatever for the Shaltari things. They’re all Hawk-era blisters, with the Gharial/Caiman and Shieldspire being great deals. The Pungari weren’t the cheapest, but they’re metal and therefore infinitely superior to resin infantry. I also did not realize this until I bought them and was doing comparisons, but the version of Pungari sold now only come with four bases, while the older Hawk one comes with eight. For a unit intended to be taken en masse, four feels like far too little, so the price difference became negligible and the purchase obvious.
I was surprised to find the laser gun pods on the Gharial are actually metal too! I doubt the newer kit has those in metal, although of course it comes with both gun options. I sort of like how this variant looks like a duck bill, goofy though that is.
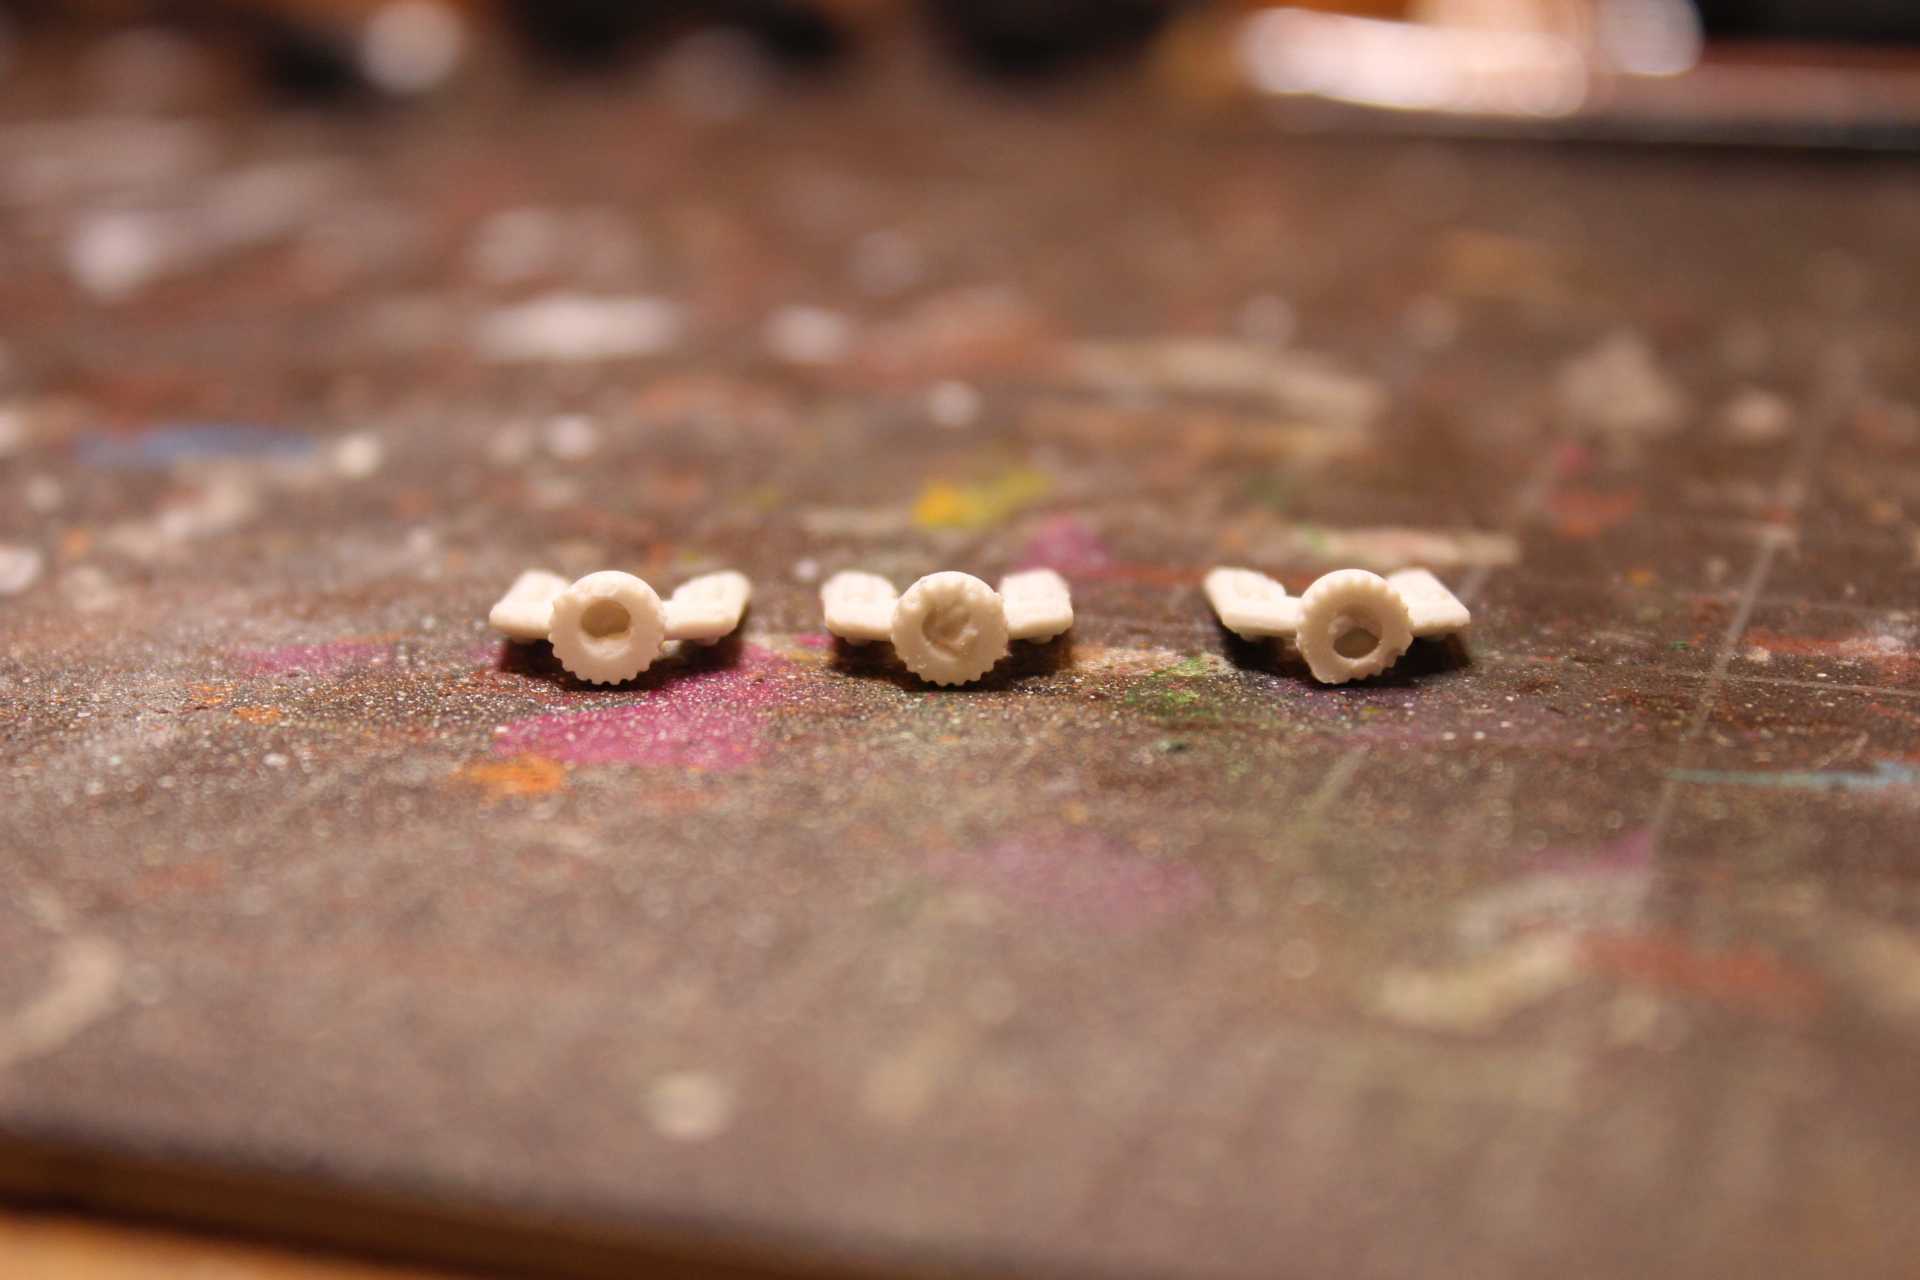
Just one casting problem (besides significant but easily cleaned flash on the spire). The antenna-whatever bits all had terrible casts on the attachment plug, so I had to clean them up and drill new holes in two of the three.
Paint job:
Pungari: Rustoleum Flat Black primer, dry brush Vallejo Wolf Grey. Citadel Contrast Hexwraith Green on the armor/gun, Vallejo Tinny Tin for the weapon, Vallejo Bloody Red for the eyes. Bases were done as described in an earlier post.
The vehicles are essentially the same, but the lenses are done with the same Spiritstone Red as the PHR lenses. The main problem I have with Shaltari models is getting the appropriate amount of dry brushing done prior to the tinting/coloring with contrast. I prefer how it looks a bit darker after a light dry brushing, but it’s very easy to go either too light and getting no color from the green, or too heavy and losing that nice depth. The Gharial and Shieldspire seen earlier are respective examples of that.
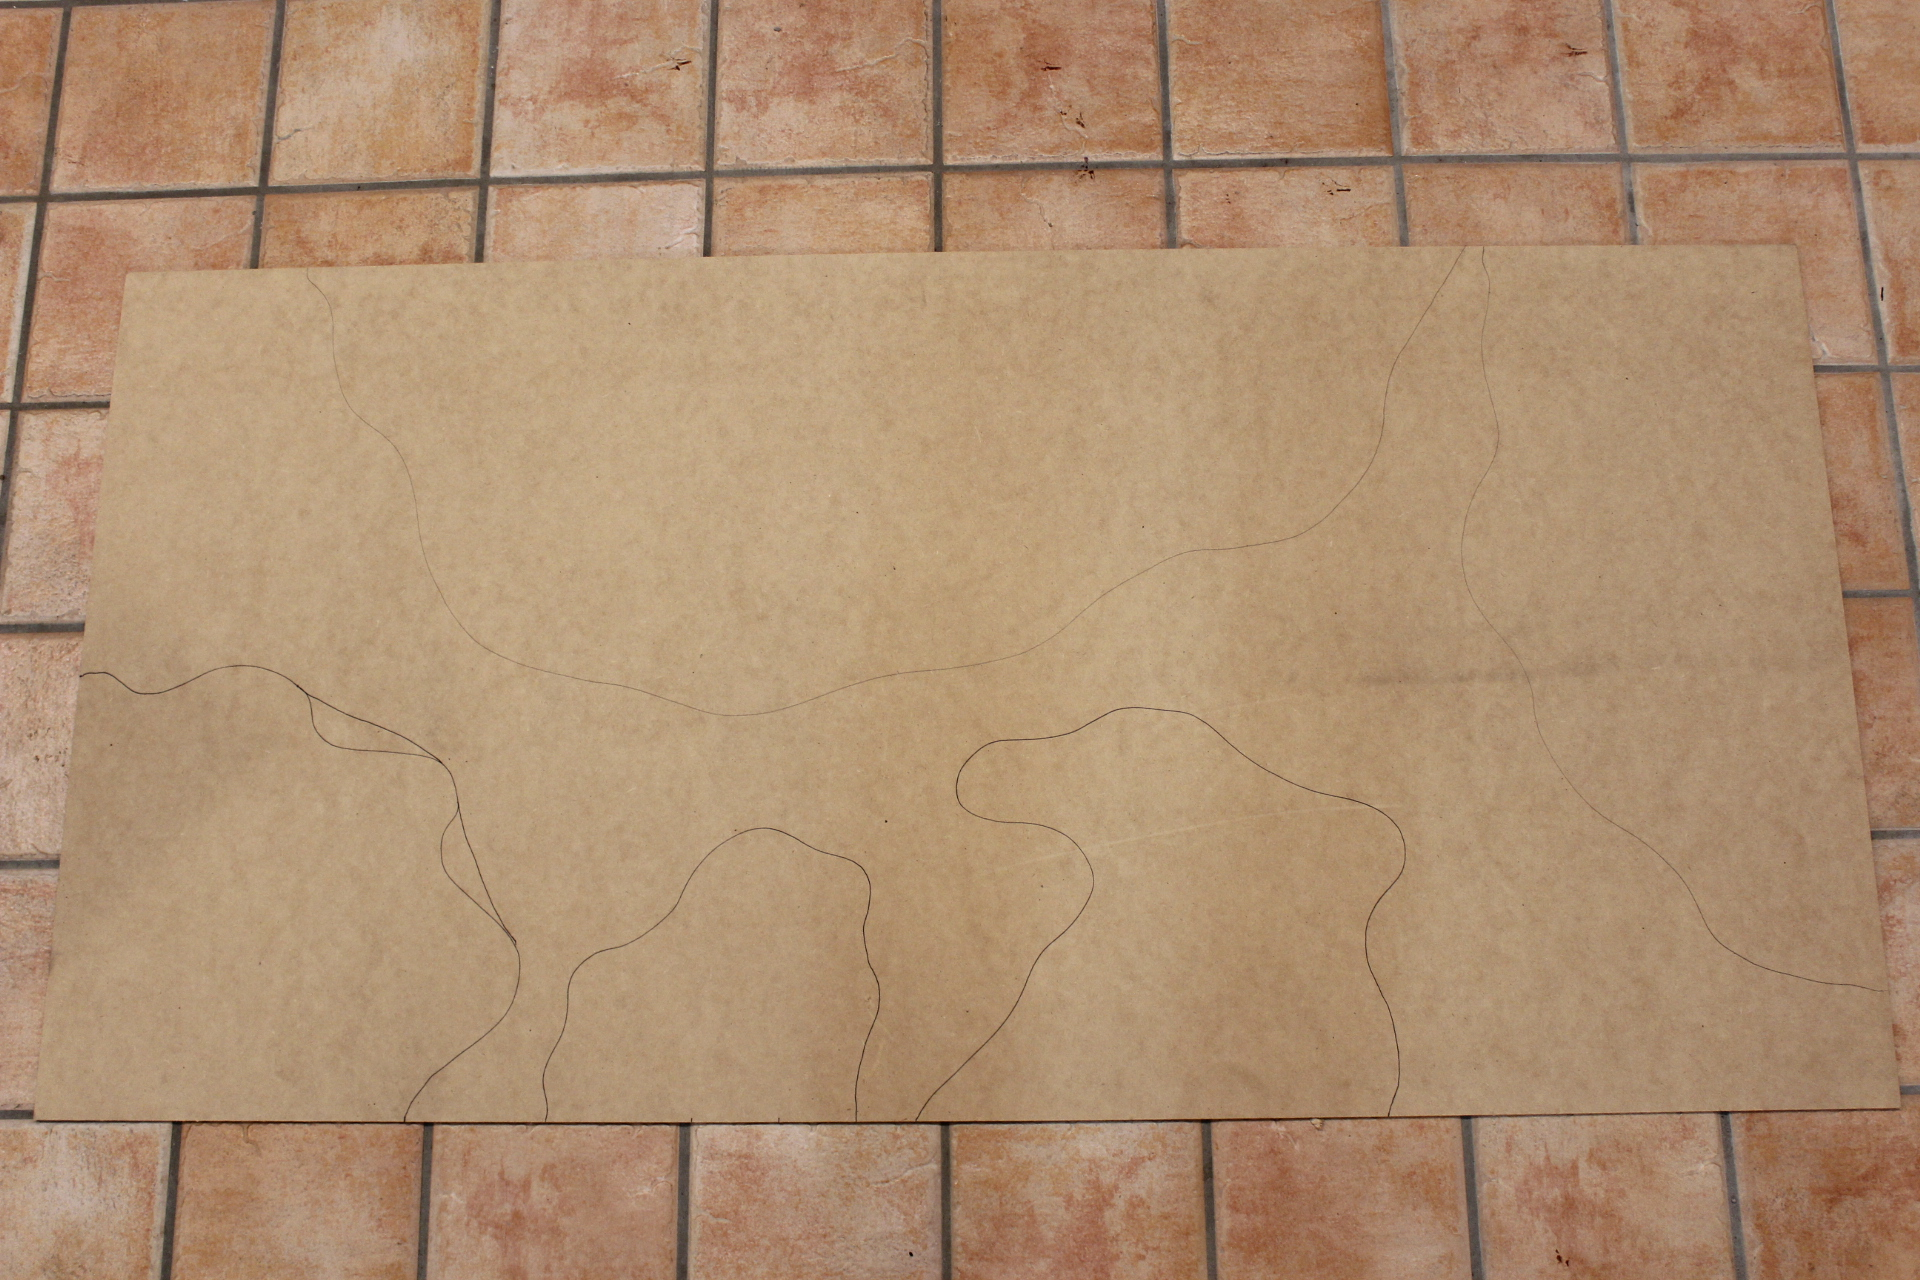
Some early terrain work in progress! My intended plan is to make a combination of ‘base’ and ‘detail’ pieces. I want some larger flat surfaces that remain largely playable, while building smaller detailed pieces that can be placed anywhere to add flavor or board blockers.
First, some hardboard for a base. I decided to make edge pieces first, and traced random shapes.

A jigsaw makes easy work of cutting out a piece.
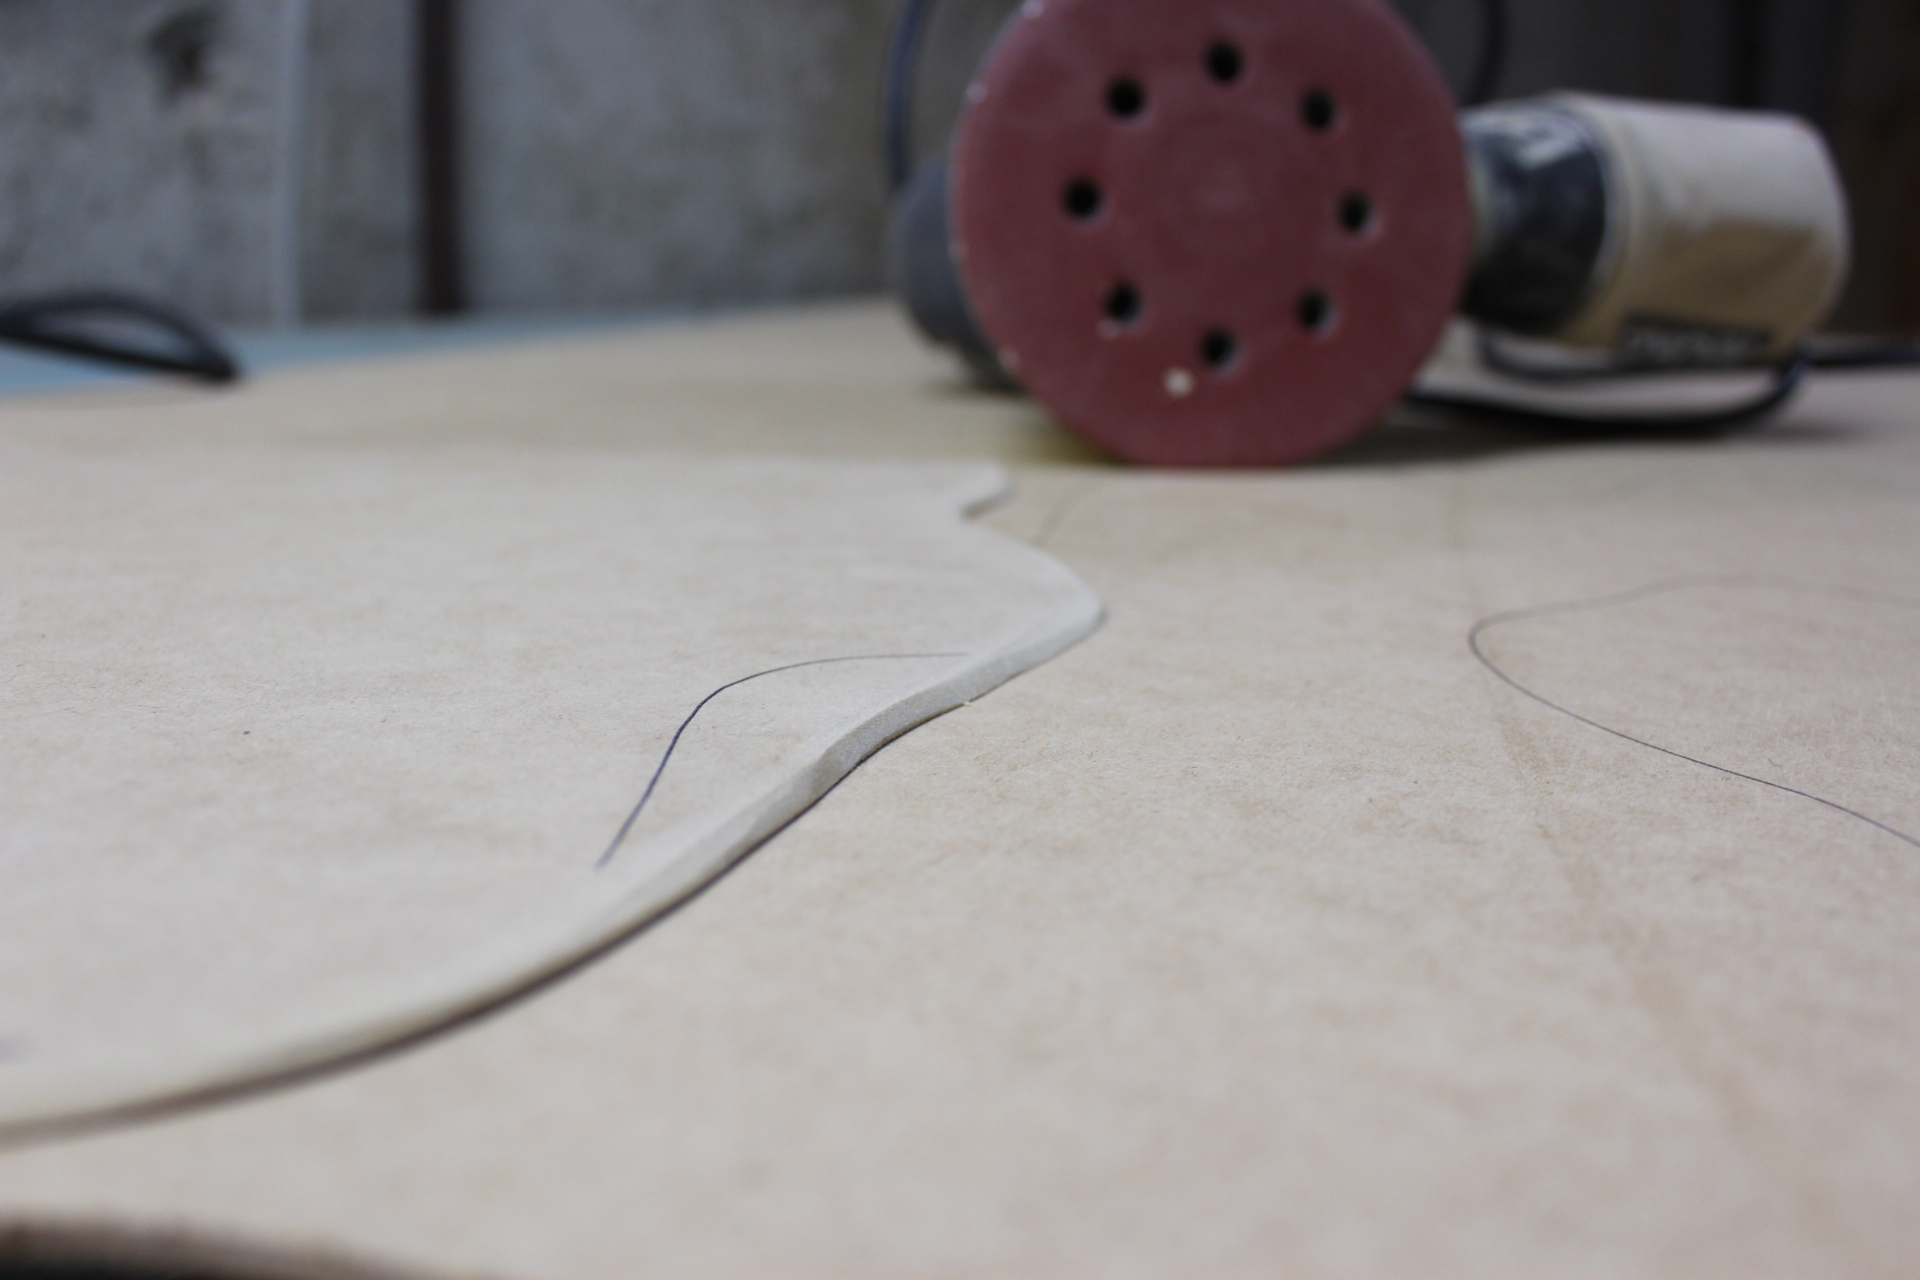
And the edges are sanded at a bit of an angle to help them blend into the surface. A harsh 90 degree angle would look very odd after all!
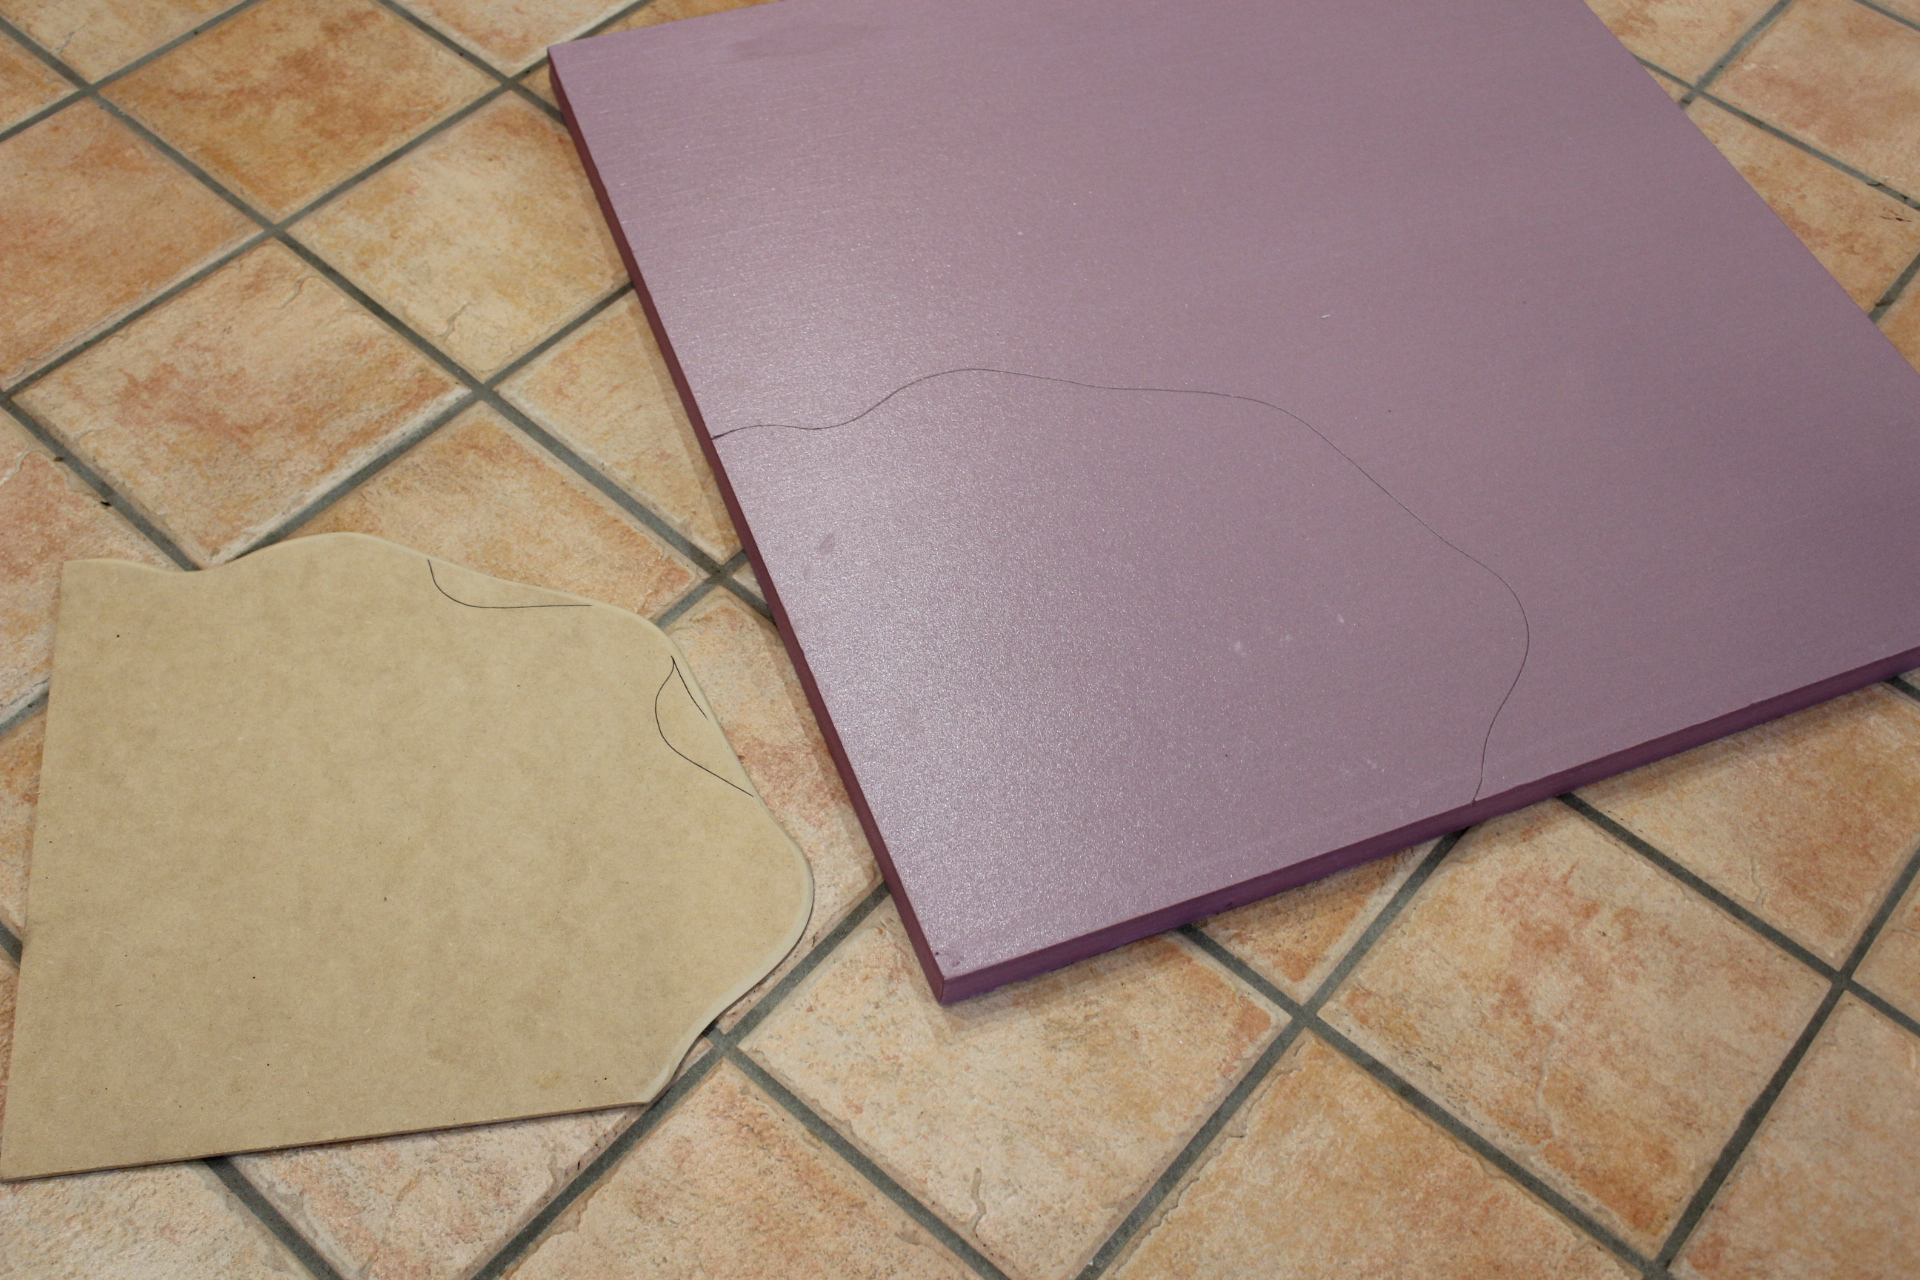
A panel of your typical extruded polystyrene was nabbed along with the hardboard. The piece is traced on the panel…
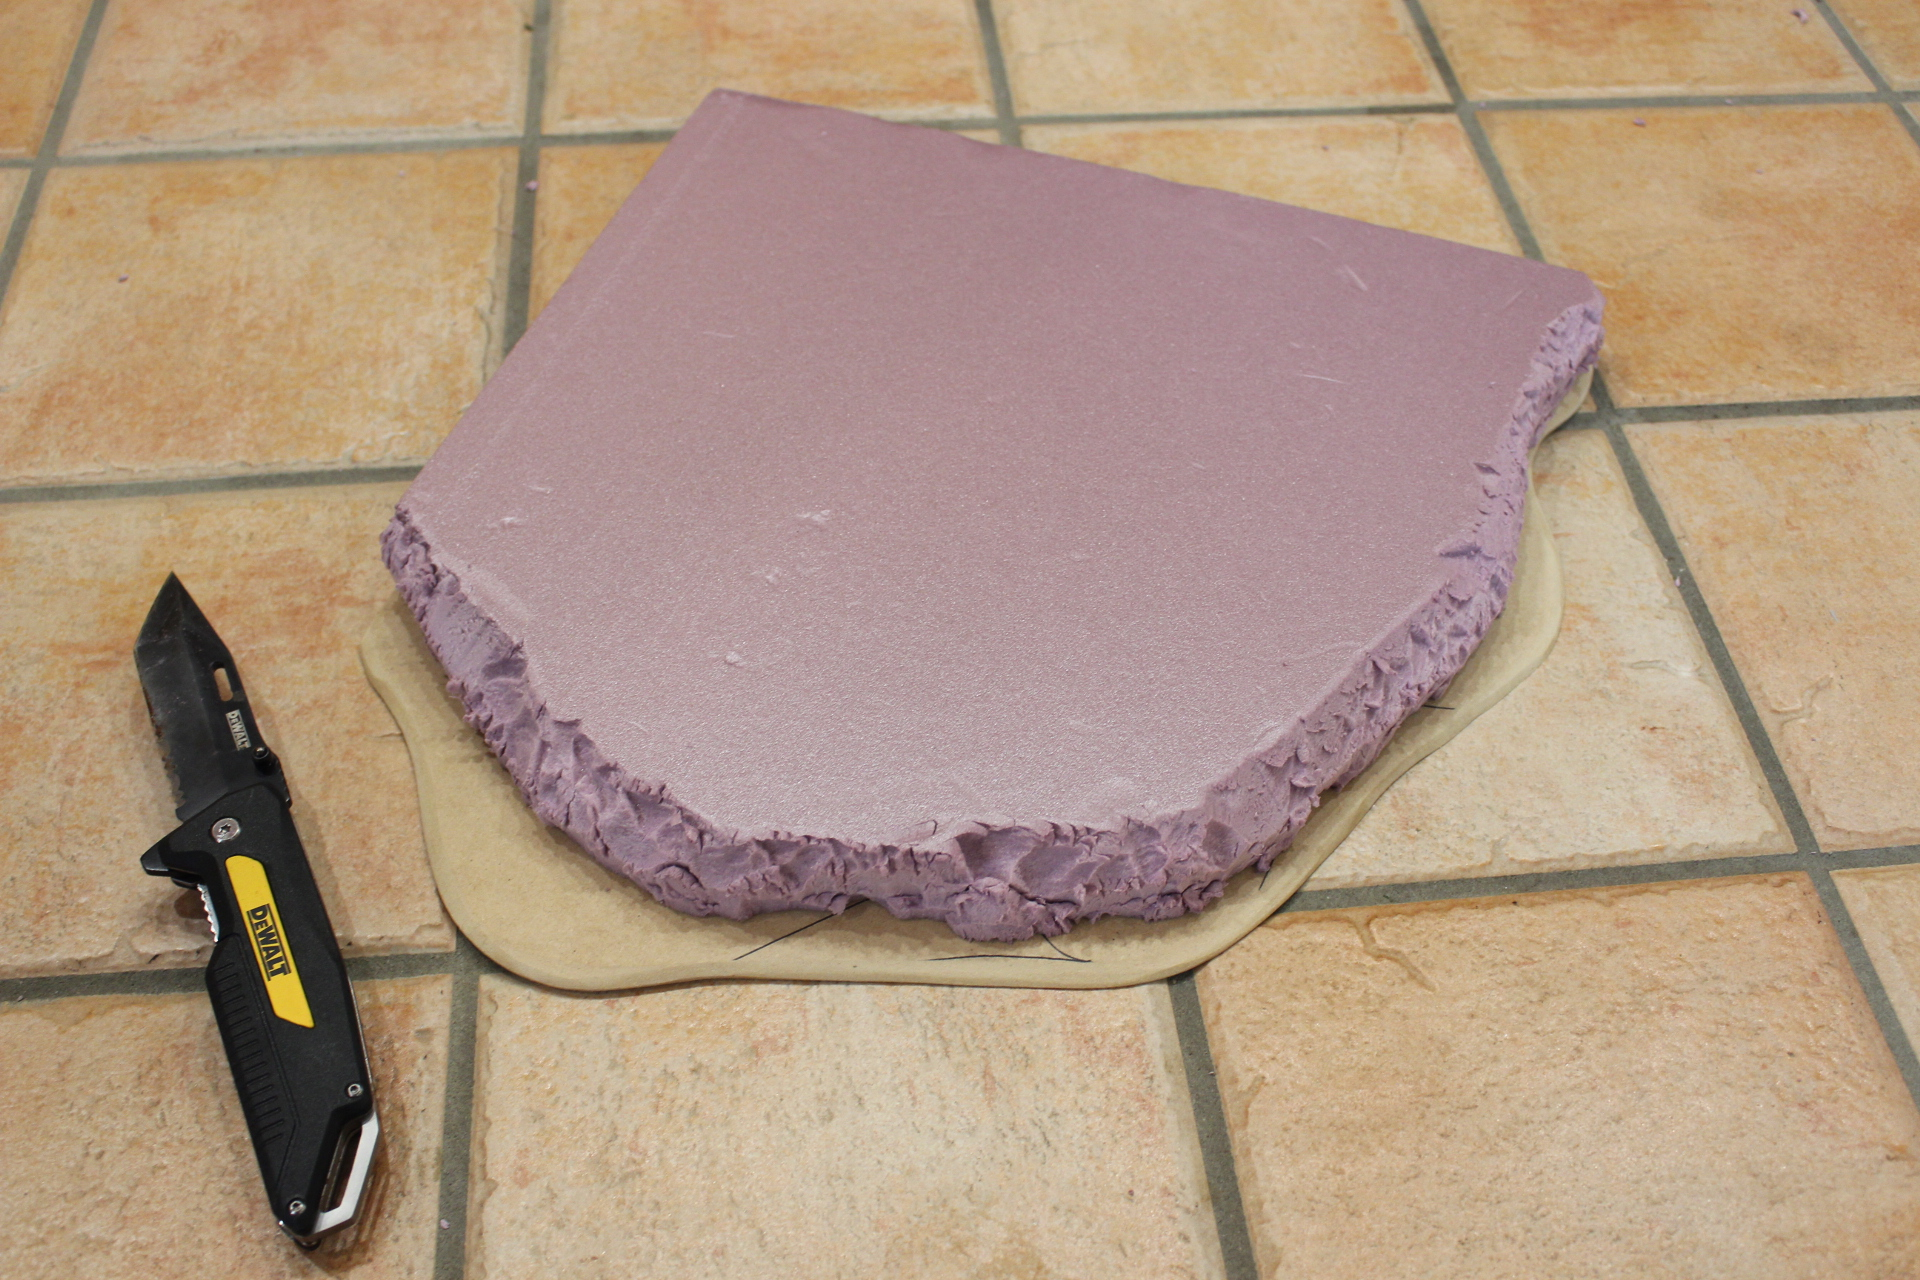
And hacked out with a knife. The edge is now looking like those very common “Easy Build Terrain!!”, and honestly, I could see it looking ok with some paint and detailing. I want things a bit smoother for the most part though, so I’m going to be doing more work.
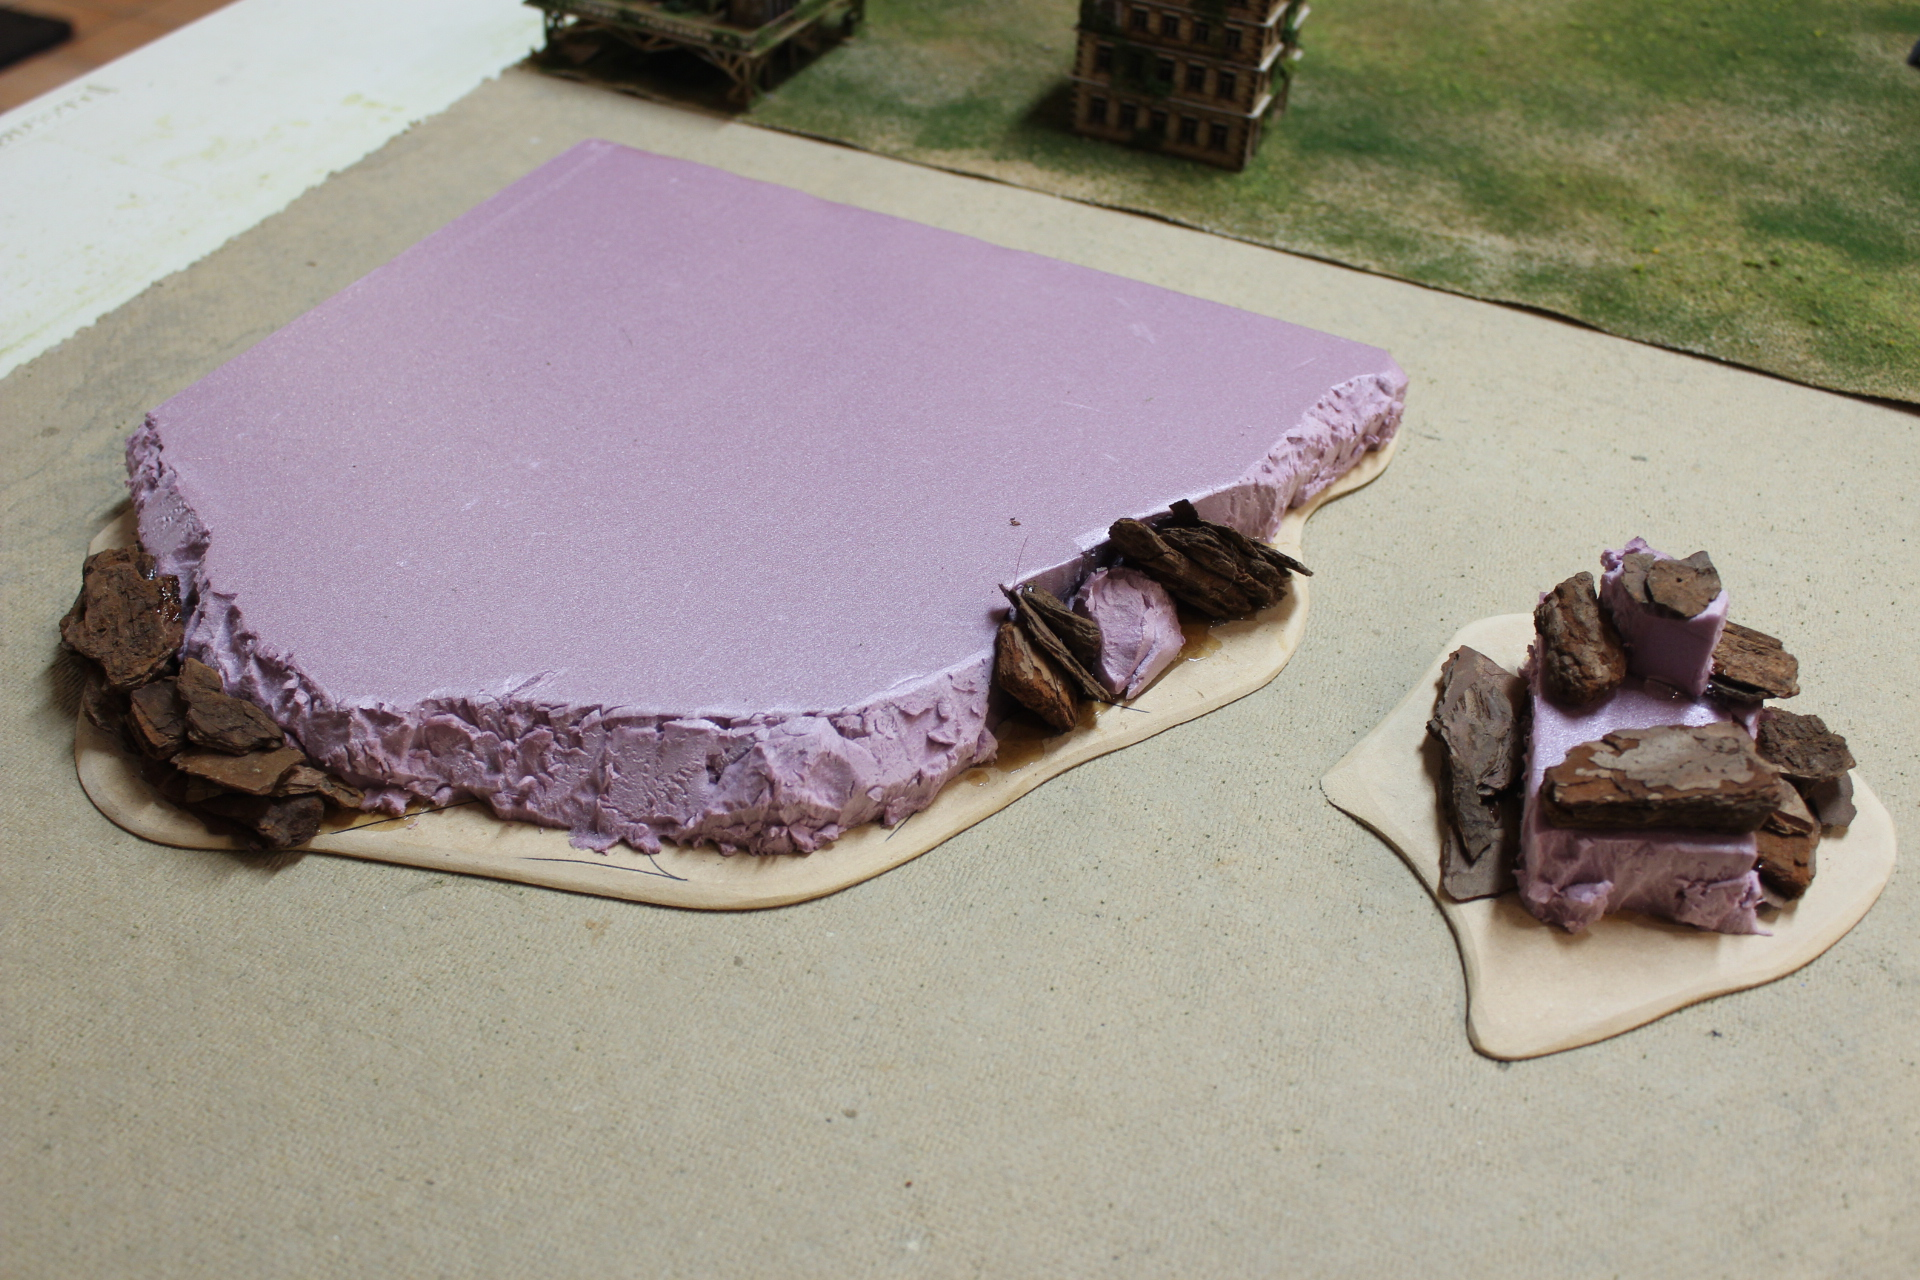
The foam is glued down with PVA to my first two test pieces, and bark chips that I may or may not have sourced from landscaping details at work are attached to provide some rock structures.
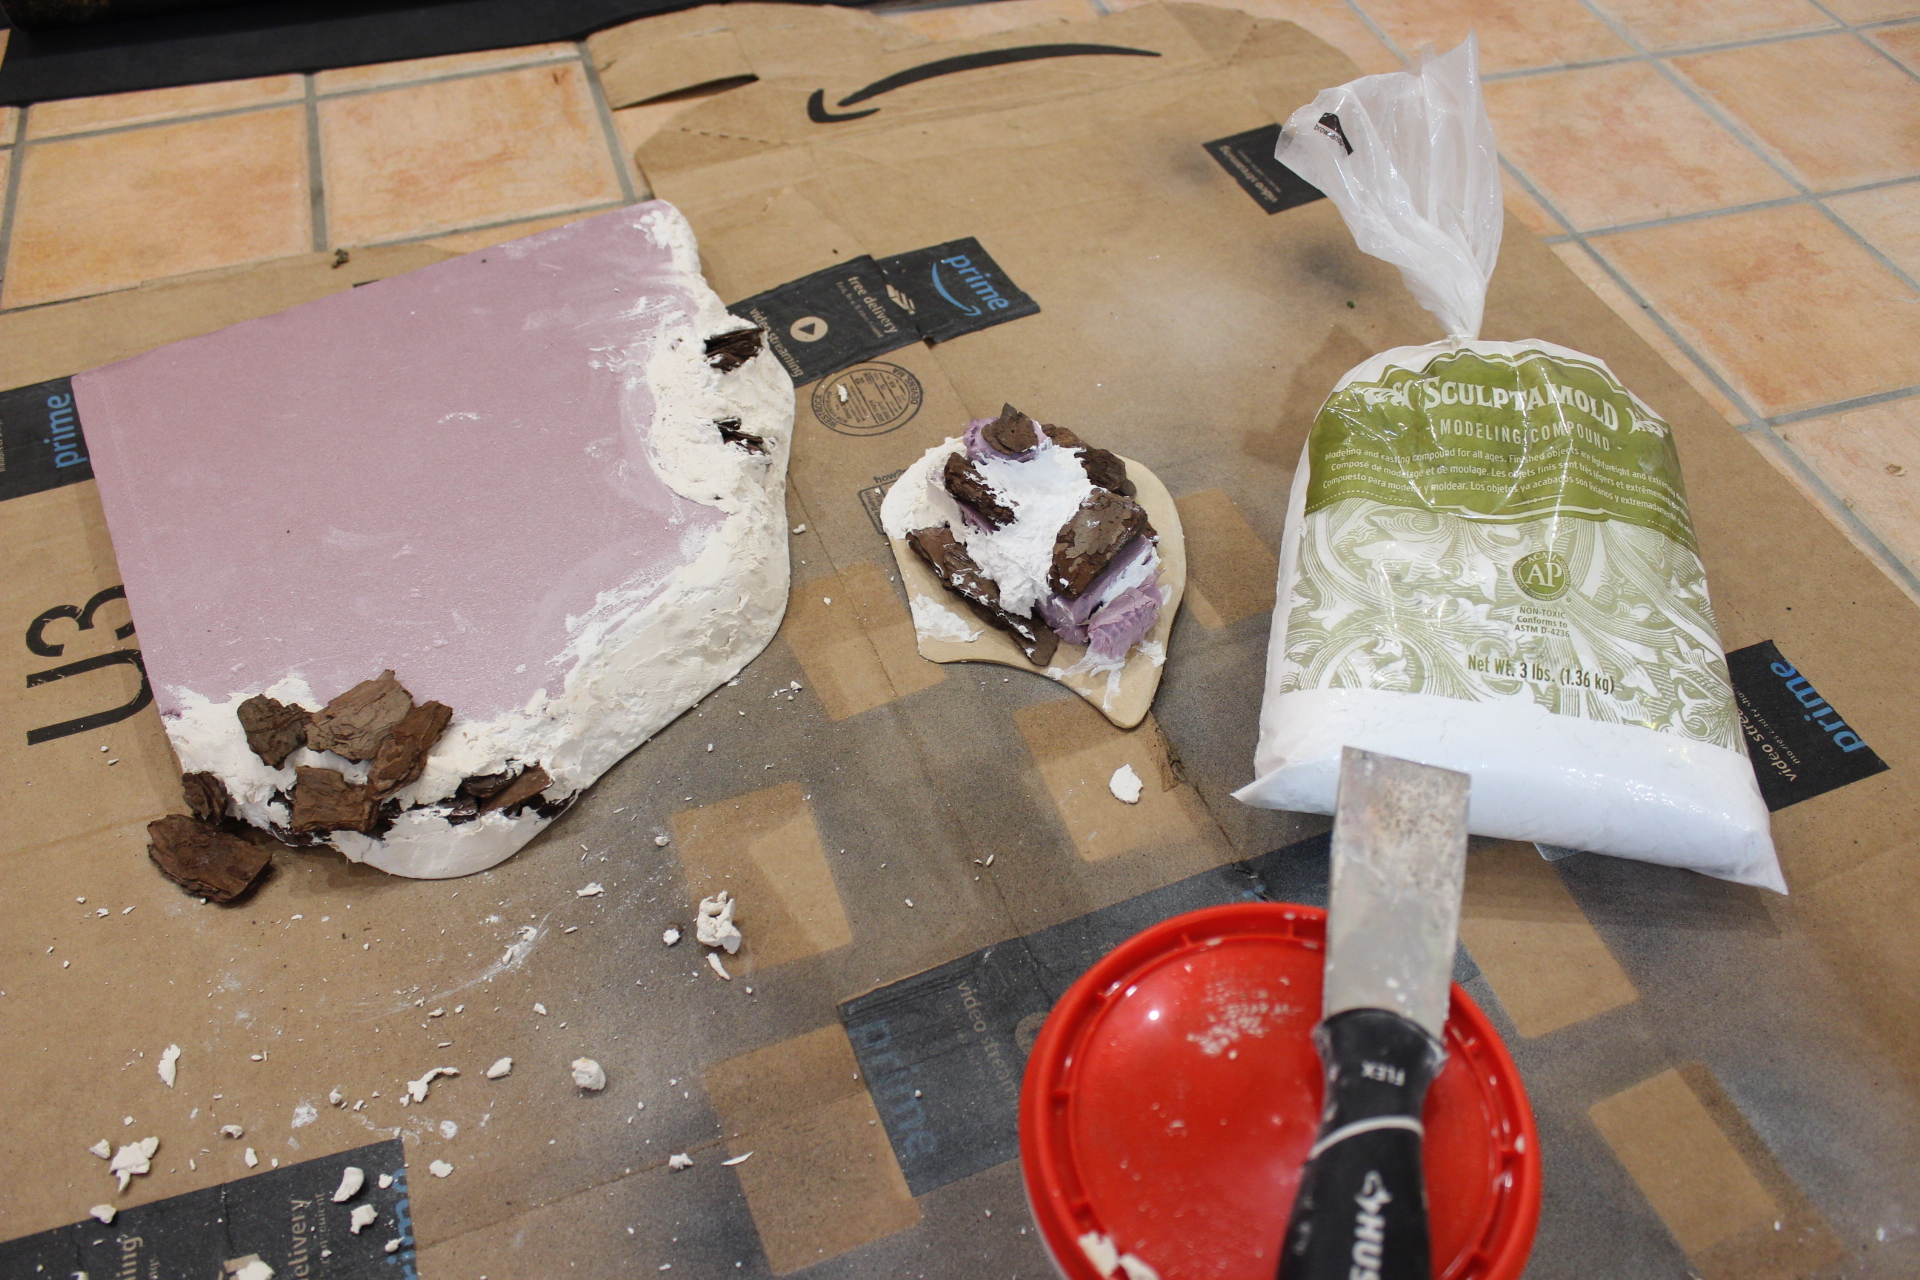
This is where I feel things have started to go off the rails. I first tried sculptamold, which I’ve had laying around unused for years at this point, and it came out too chunky. I might just need to add more water and mix better, but I decided to try some spackle on top to fill in some of the gaps caused by the chunkiness. This did not work as well as I hoped! The spackle might be a bit old, as it didn’t feel as smooth as I felt it should, and I did pick it up a long time ago for some house repairs, so may just be starting to go bad.
Sanding may help with some of the issues, so that’ll be next, likely followed by an attempt at thinner sculptamold. If that goes well, painting is next, but picking up some cheap craft acrylics will need to be done before that.